
Demystifying Horizon View Certs - Easily install a signed certificate
Horizon View certs giving you a headache? Follow this post to take away the complication and get those servers green! This post will cover installing certs for all versions of VMware View (Horizon).
Disclaimer: This post is based off KB 2068666
We'll be using the Microsoft Management Console (MMC) Certificates Snap-in.
Once the 3rd Party CA has provided you the certificate, download the necessary files (in most cases this would be the Tomcat/P7B/bundle provided by the CA). If they provide host, intermediate, and root certs, download all 3 files. Now we'll launch MMC on the Connection Server to install the cert.
If you're on View 5.1 or later, you're done! All you need to do is restart the View Connection Server Service for it to pick up the new certificate. After the service starts, wait up to 5 minutes before the View Admin page reflects the Green status.
If you're on View 5.0.x or earlier, you must now export the cert as a PFX from the MMC console, place into the local SSL directory, and update your locked.properties file with the cert's path.
If this post helped you get your cert installed, let me know in the comments! Good luck!
Disclaimer: This post is based off KB 2068666
Generate the Certificate Request
We'll be using the Microsoft Management Console (MMC) Certificates Snap-in.
- From your Connection Server or some other Windows Server click Start > Run > MMC
- Click File > Add/Remove Snap-in...
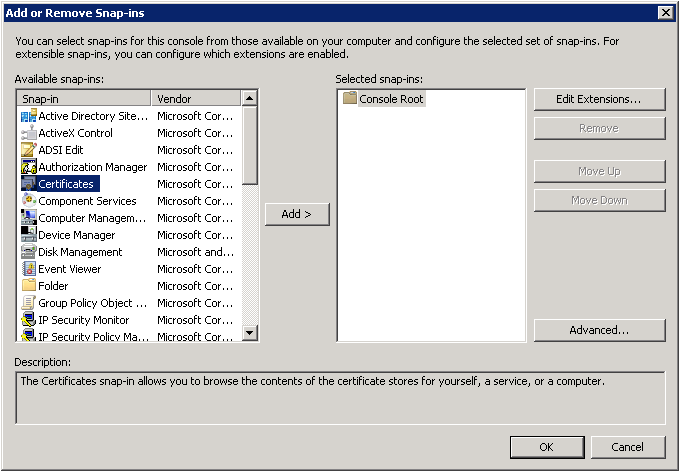
- Highlight Certificates and click Add >
- Choose Computer account and click Next
- Choose Local Computer > Finish
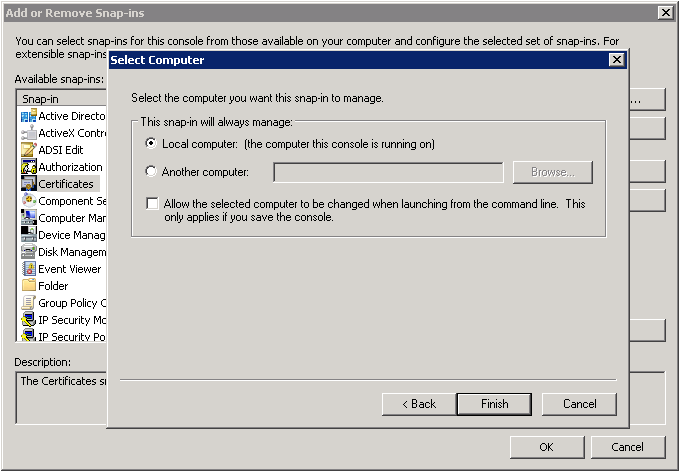
- Ensure you see Certificates (Local Computer) under Selected snap-ins and click OK
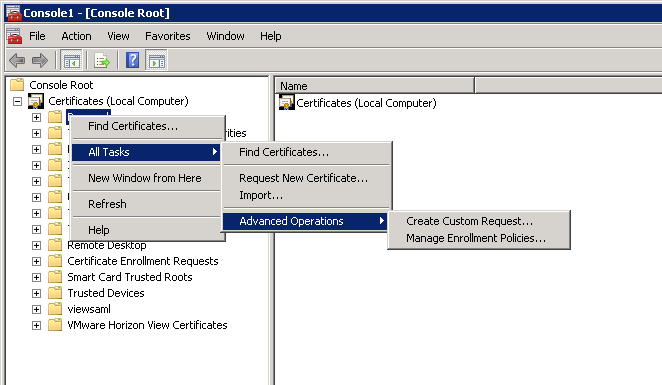
- Expand Certificates (Local Computer) and right click Personal > All Tasks > Advanced Operations > Create Custom Request
- Per the splash screen, verify the computer is connected to the network and you have credentials that can be used to verify your right to obtain the certificate and click Next
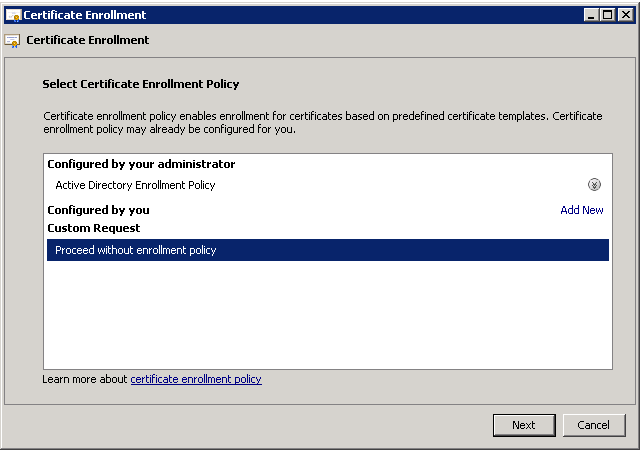
- Under Custom Request, highlight Proceed without enrollment policy and click Next
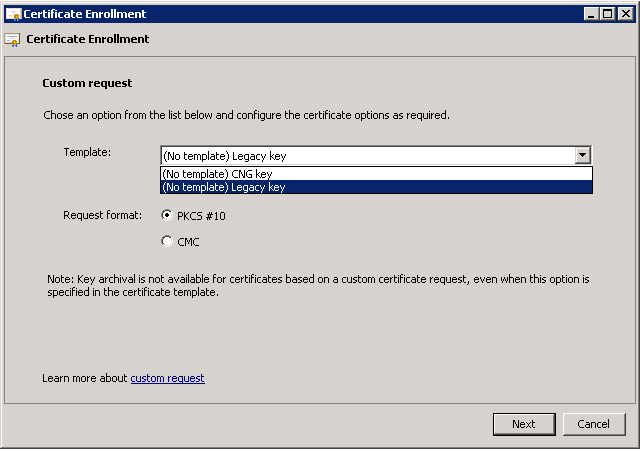
- Select No Template Legacy key from the drop down and ensure PKCS #10 is selected. Click Next
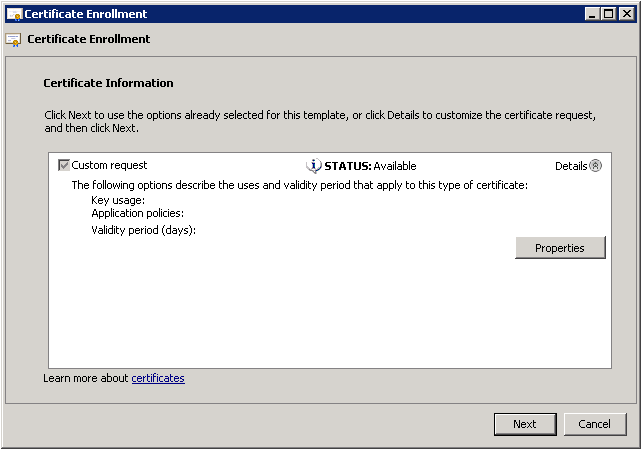
- Expand Details and click Properties
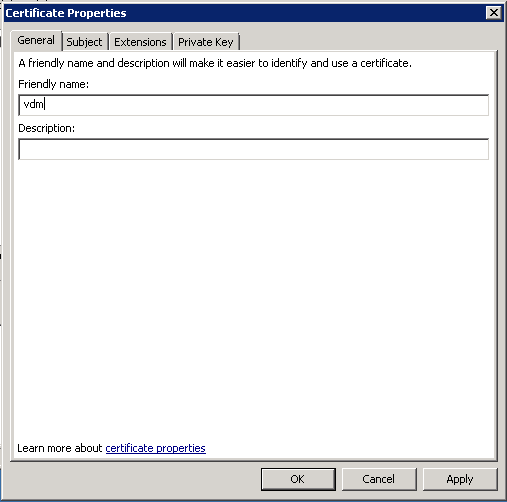
- On the General tab, type vdm for the Friendly name
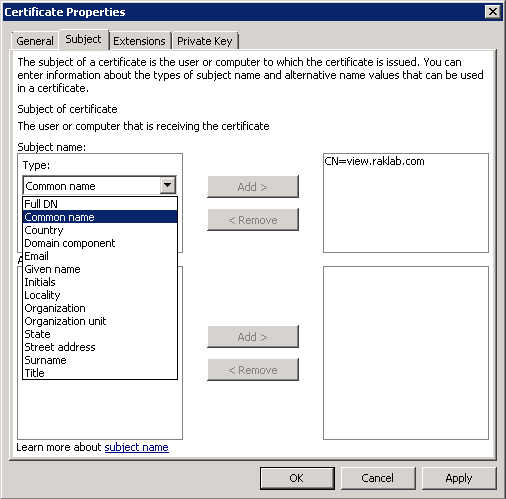
- Click the Subject tab and enter the below values


| Common Name | Value = FQDN of View Server | Click on Add Button |
| Country | Value = (2 Letter Country Code, e.g., US) | Click on Add Button |
| Locality | Value = (Your City Location) | Click on Add Button |
| Organization | Value = (Your Company) | Click on Add Button |
| Organization Unit | Value = (Department, e.g., IT) | Click on Add Button |
| State | Value = (2 Letter State Code, e.g, CA) | Click on Add Button |

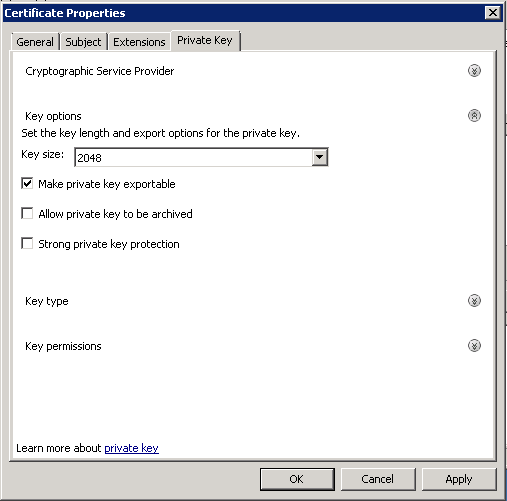
- Click the Private Key tab > Click on Key Options Details > Select Keysize 2048
- Check the box for Make private key exportable and click Ok > Next
- Save the file as a .req
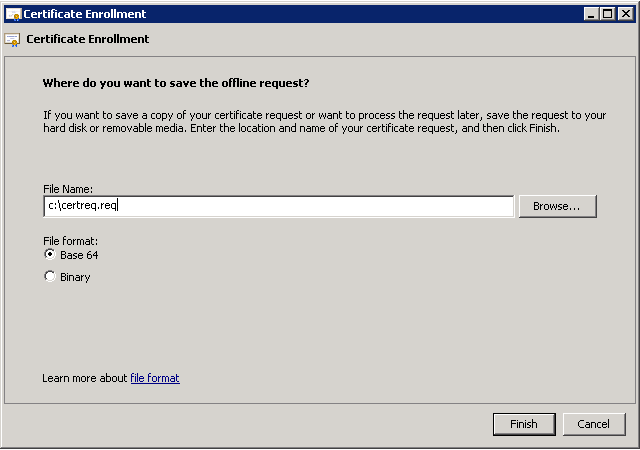
- Provide this certreq.req file to your Certificate Authority per their requirements.


Installing the Certificate
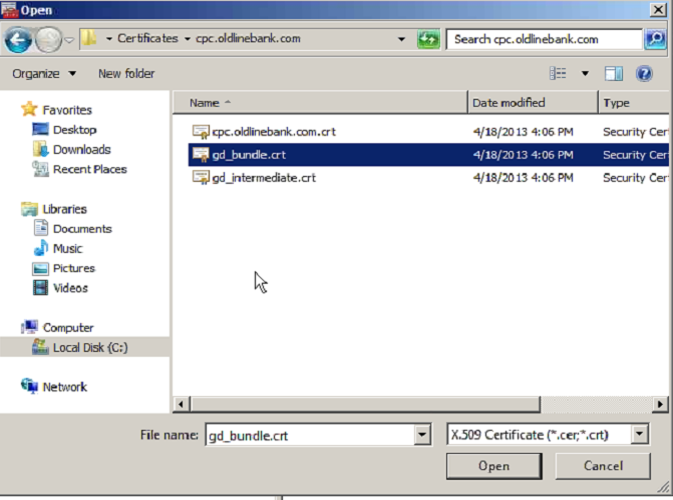
Once the 3rd Party CA has provided you the certificate, download the necessary files (in most cases this would be the Tomcat/P7B/bundle provided by the CA). If they provide host, intermediate, and root certs, download all 3 files. Now we'll launch MMC on the Connection Server to install the cert.
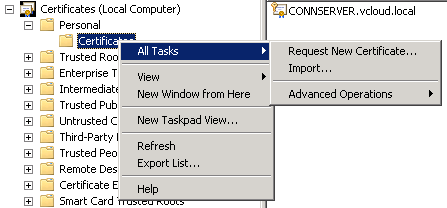
- Assuming the MMC console is still open and the cert snap-in is enabled, expand Certificates (Local Computer) > Personal > Certificates
- Right click and choose All Tasks > Import
- Select the cert bundle you downloaded
 NOTE: Make sure that whenever you're prompted you choose:
- Yes to Mark the Private Key Exportable
- Yes to all extended properties
- Yes to all certificates in the certification path
- Choose Automatically select the certificate store based on the type of certificate and click Next
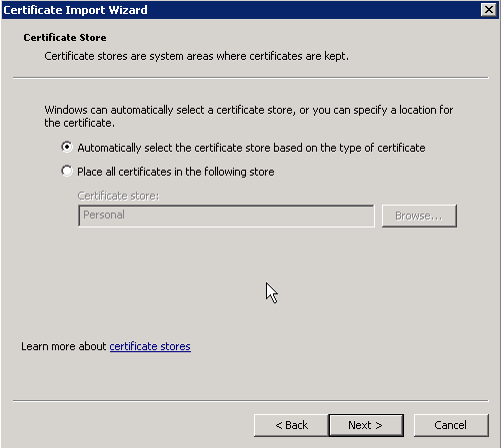
- Finish the Import wizard.


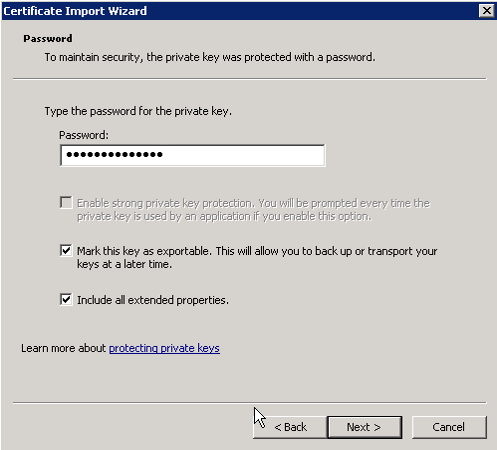
NOTE: If importing a PFX file, you will be prompted for the private key password. Check both boxes to mark as exportable and include all extended properties

Important: Completing the certificate installation
If you're on View 5.1 or later, you're done! All you need to do is restart the View Connection Server Service for it to pick up the new certificate. After the service starts, wait up to 5 minutes before the View Admin page reflects the Green status.
If you're on View 5.0.x or earlier, you must now export the cert as a PFX from the MMC console, place into the local SSL directory, and update your locked.properties file with the cert's path.
- Copy the PFX you exported to the SSL Gateway directory on the Connection Server (usually install_directory\VMware\VMware View\Server\sslgateway\conf)
- Edit locked.properties in the same directory to contain the PFX file name and password you set during export (if you don't have a locked.properties file, you'll need to create it)
keyfile=key.pfx
keypass=secret - Restart the Connection Server service
If this post helped you get your cert installed, let me know in the comments! Good luck!