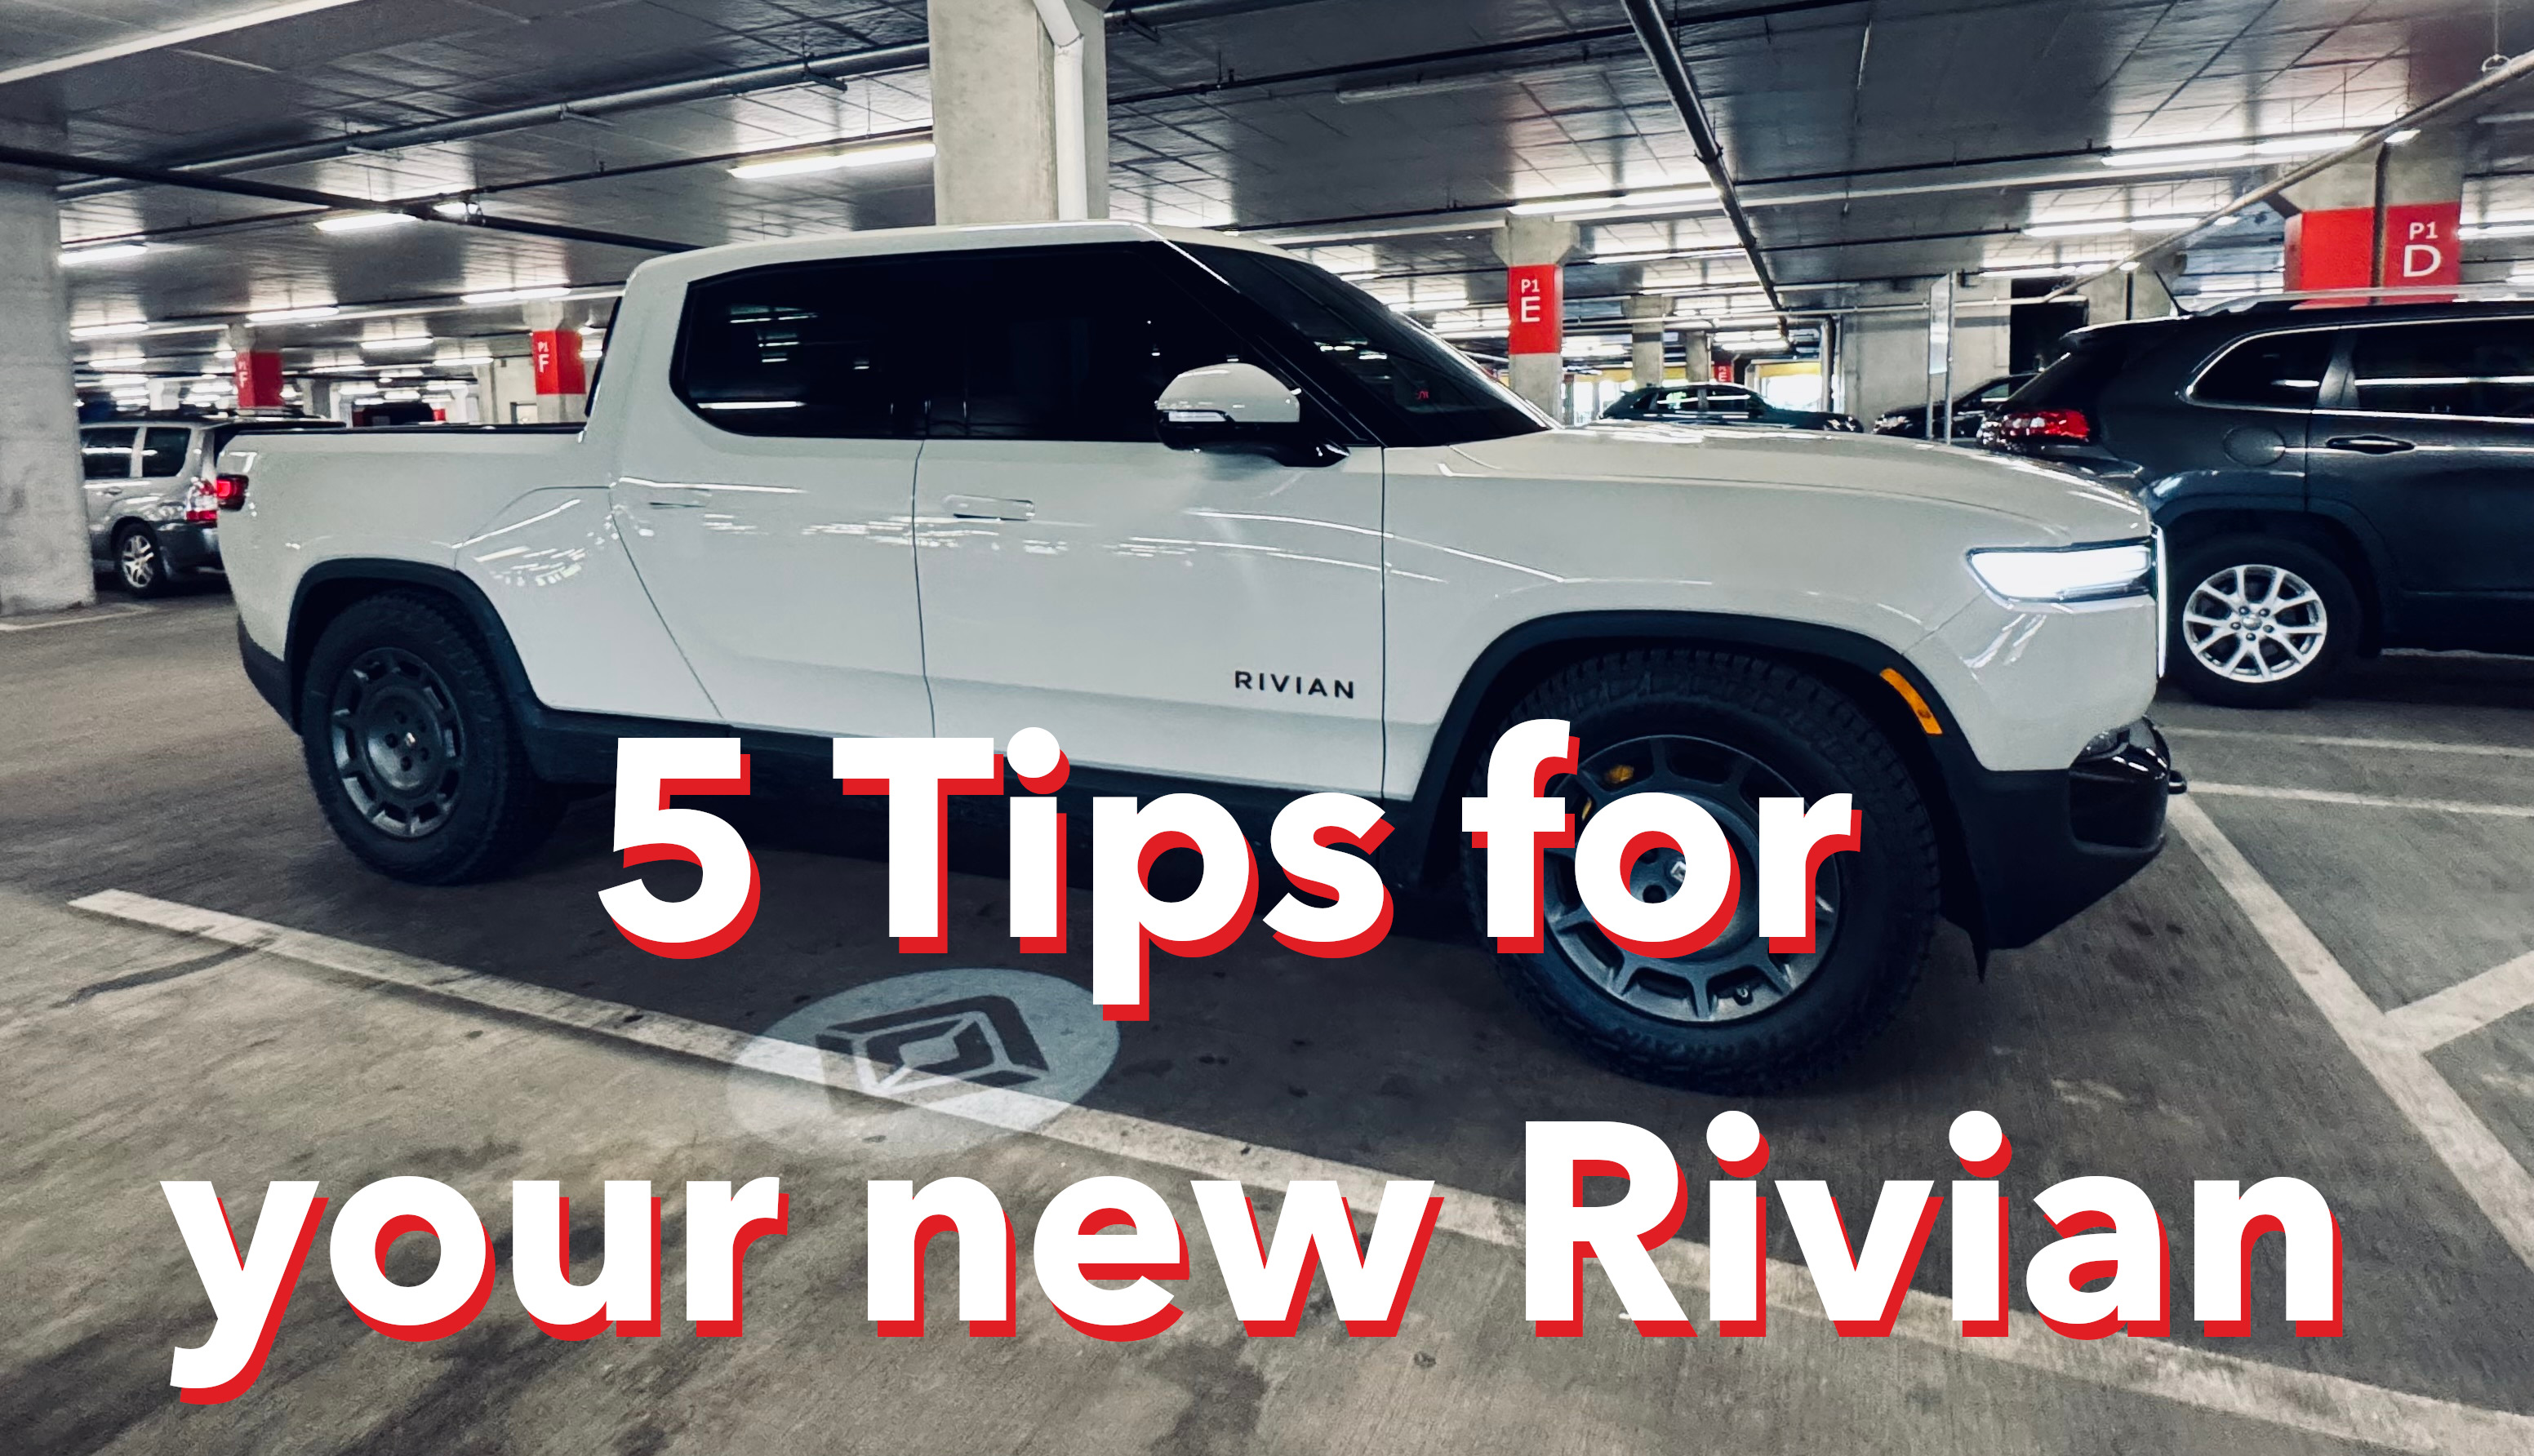
So, you’ve just taken delivery of your new Rivian and are trying to remember all the Infotainment settings and options you covered with your Rivian Guide. There’s a lot to dig into! I’ve compiled five essential tips to help you get the most out of your new ride. Whether it’s an R1T, R1S, or even an upcoming R2! Here we go!
Get $500 of Rivian credit! Use code RYAN4190772 when ordering your new Rivian.
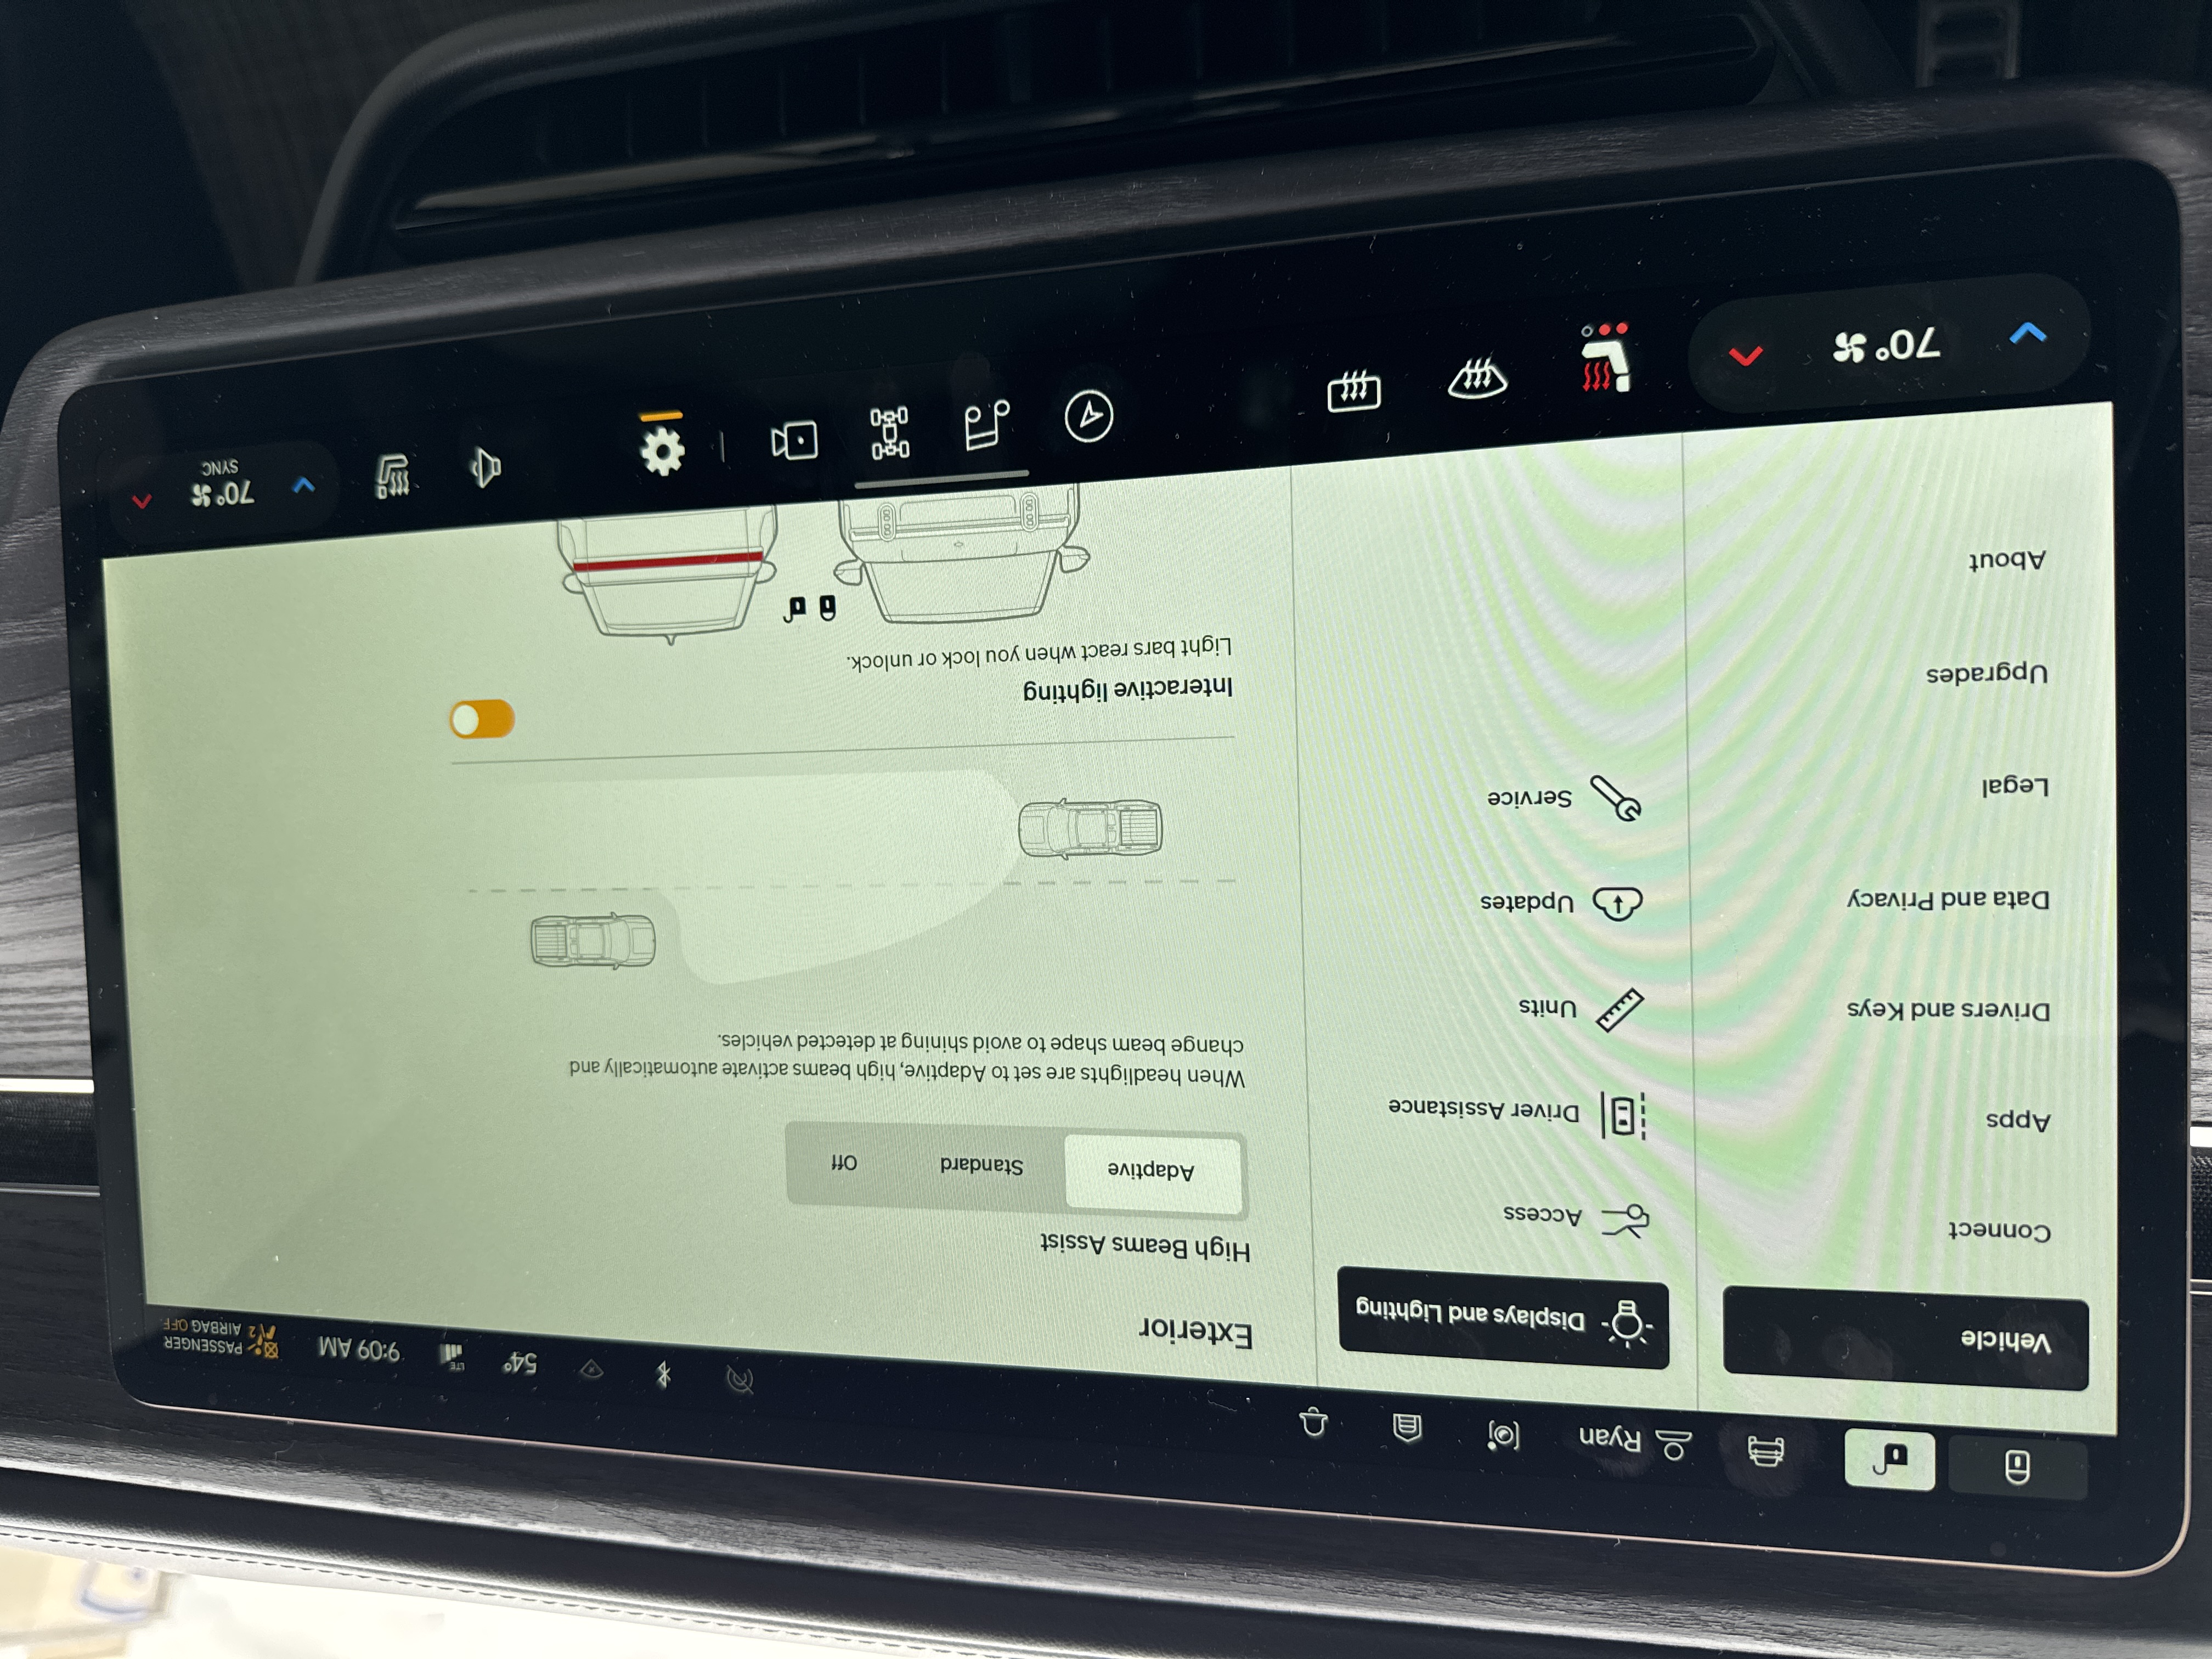
1. Adaptive High Beam Assist
Starting off with a bang, this is definitely one of my favorite features of the R1 Gen 2 vehicles. Also known as Adaptive Drive Beam (ADB), this tech enhances nighttime driving by dynamically adjusting the headlight beams to maximize road illumination while avoiding blinding glare for oncoming drivers. It really is so cool to see in action!
To enable Adaptive High Beams Assist, go to Settings > Vehicle > Displays and Lighting > and configure High Beams Assist to Adaptive
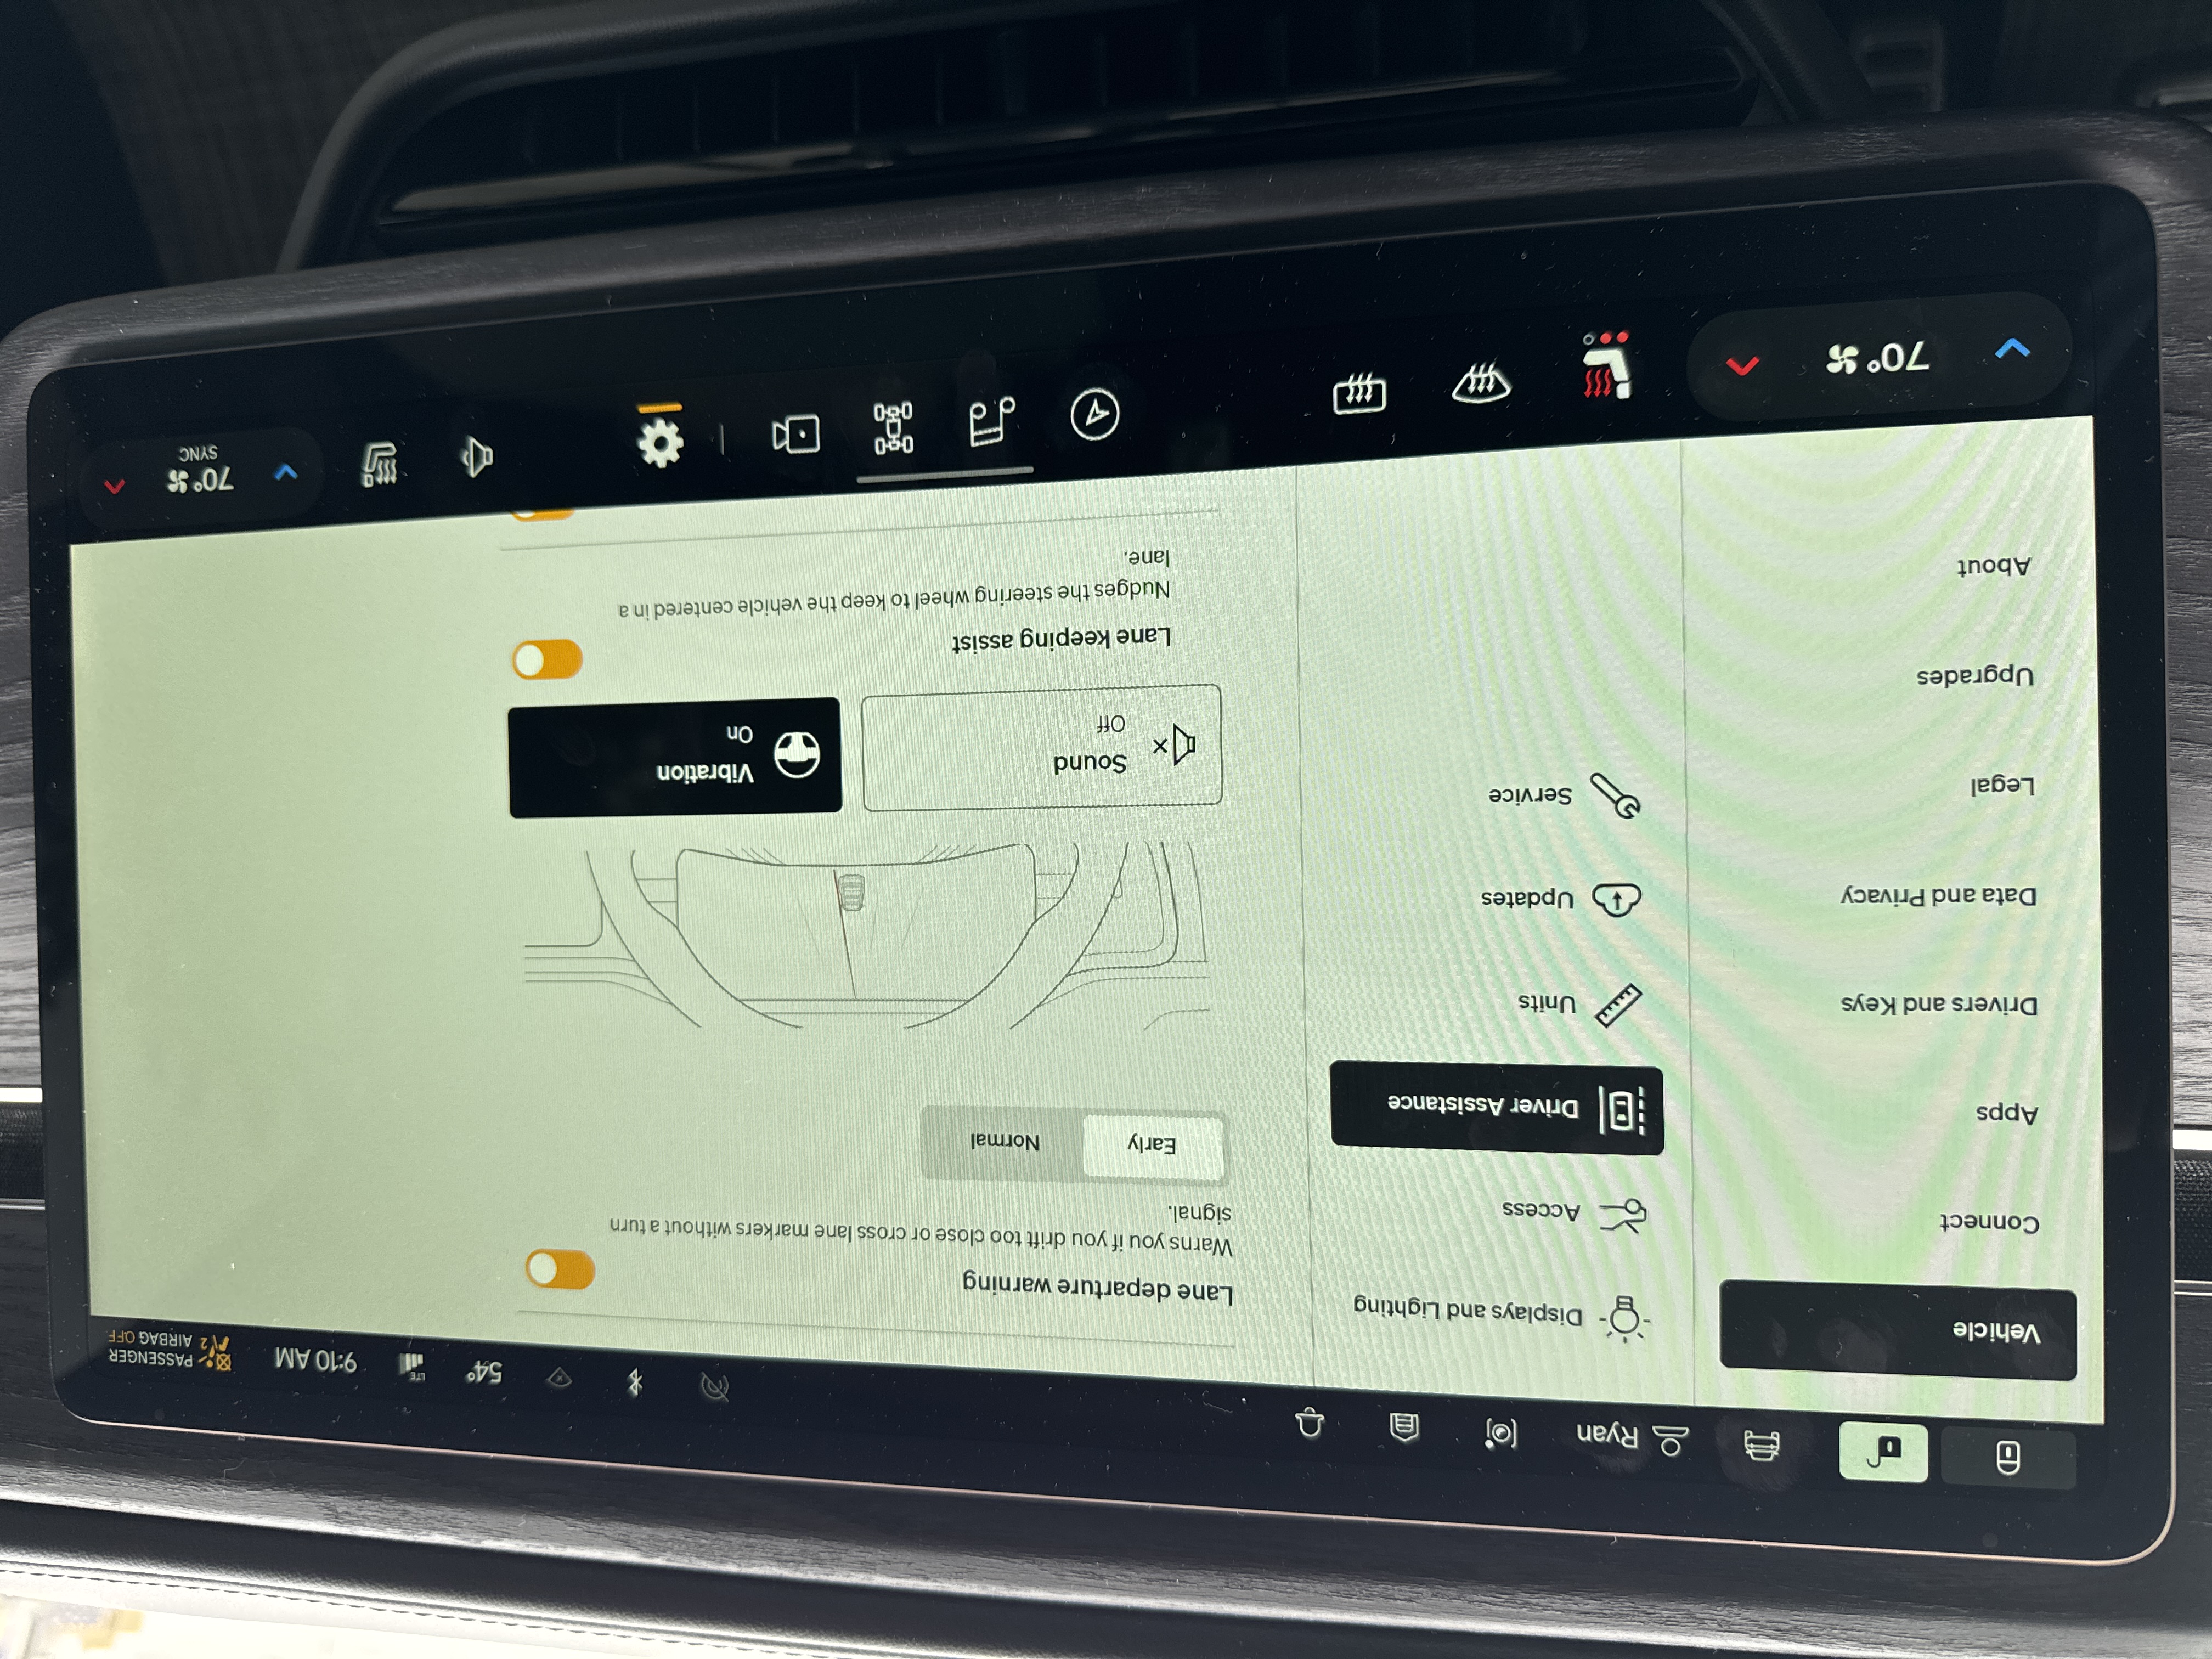
2. Lane Departure
This may be more subjective, but my thoughts are if you’re going to have it, go all in so that you maximize the value. Lane Departure is most effective when it has the highest liklihood of keeping you from crossing the paint lines and driving into oncoming traffic, or swiping into the car next to you. For this reason, I suggest configuring Lane Departure to its most sensitive option.
To maximize Lane Departure safety, go to Settings > Vehicle > Driver Assistance > Lane departure warning and configure it to Early. The Normal setting was just a little to lax for my liking. I also prefer the steering wheel vibration and Lane Keeping Assist enabled.
3. Software Updates
My Rivian Guide made a clear point to keep software updates as a munual procedure, i.e., keeping Automatic Updates disabled. The biggest reason being you don’t want to need to hop in the car only to find it in the middle of an update, crippling your ability to get going. You would be forced to sit and wait for the update to complete, which can take up to an hour on average.
This setting is probably disabled by default for you, but take a moment to go double check: Settings > Vehicle > Updates and ensure Automatically install updates is toggled Off. Now, you can ensure you kick off future software updates when the timing is best for you.

4. Finding Your Odometer
A common question on Rivian forums and online discussions is how to know how many miles you’ve actually driven your car. Many people say, “It’s in the app” which is true, but there is indeed a way to see it in the vehicle itself, as you would expect.
To see your total driven miles head to Settings > About and you’ll see your Odometer in the top right

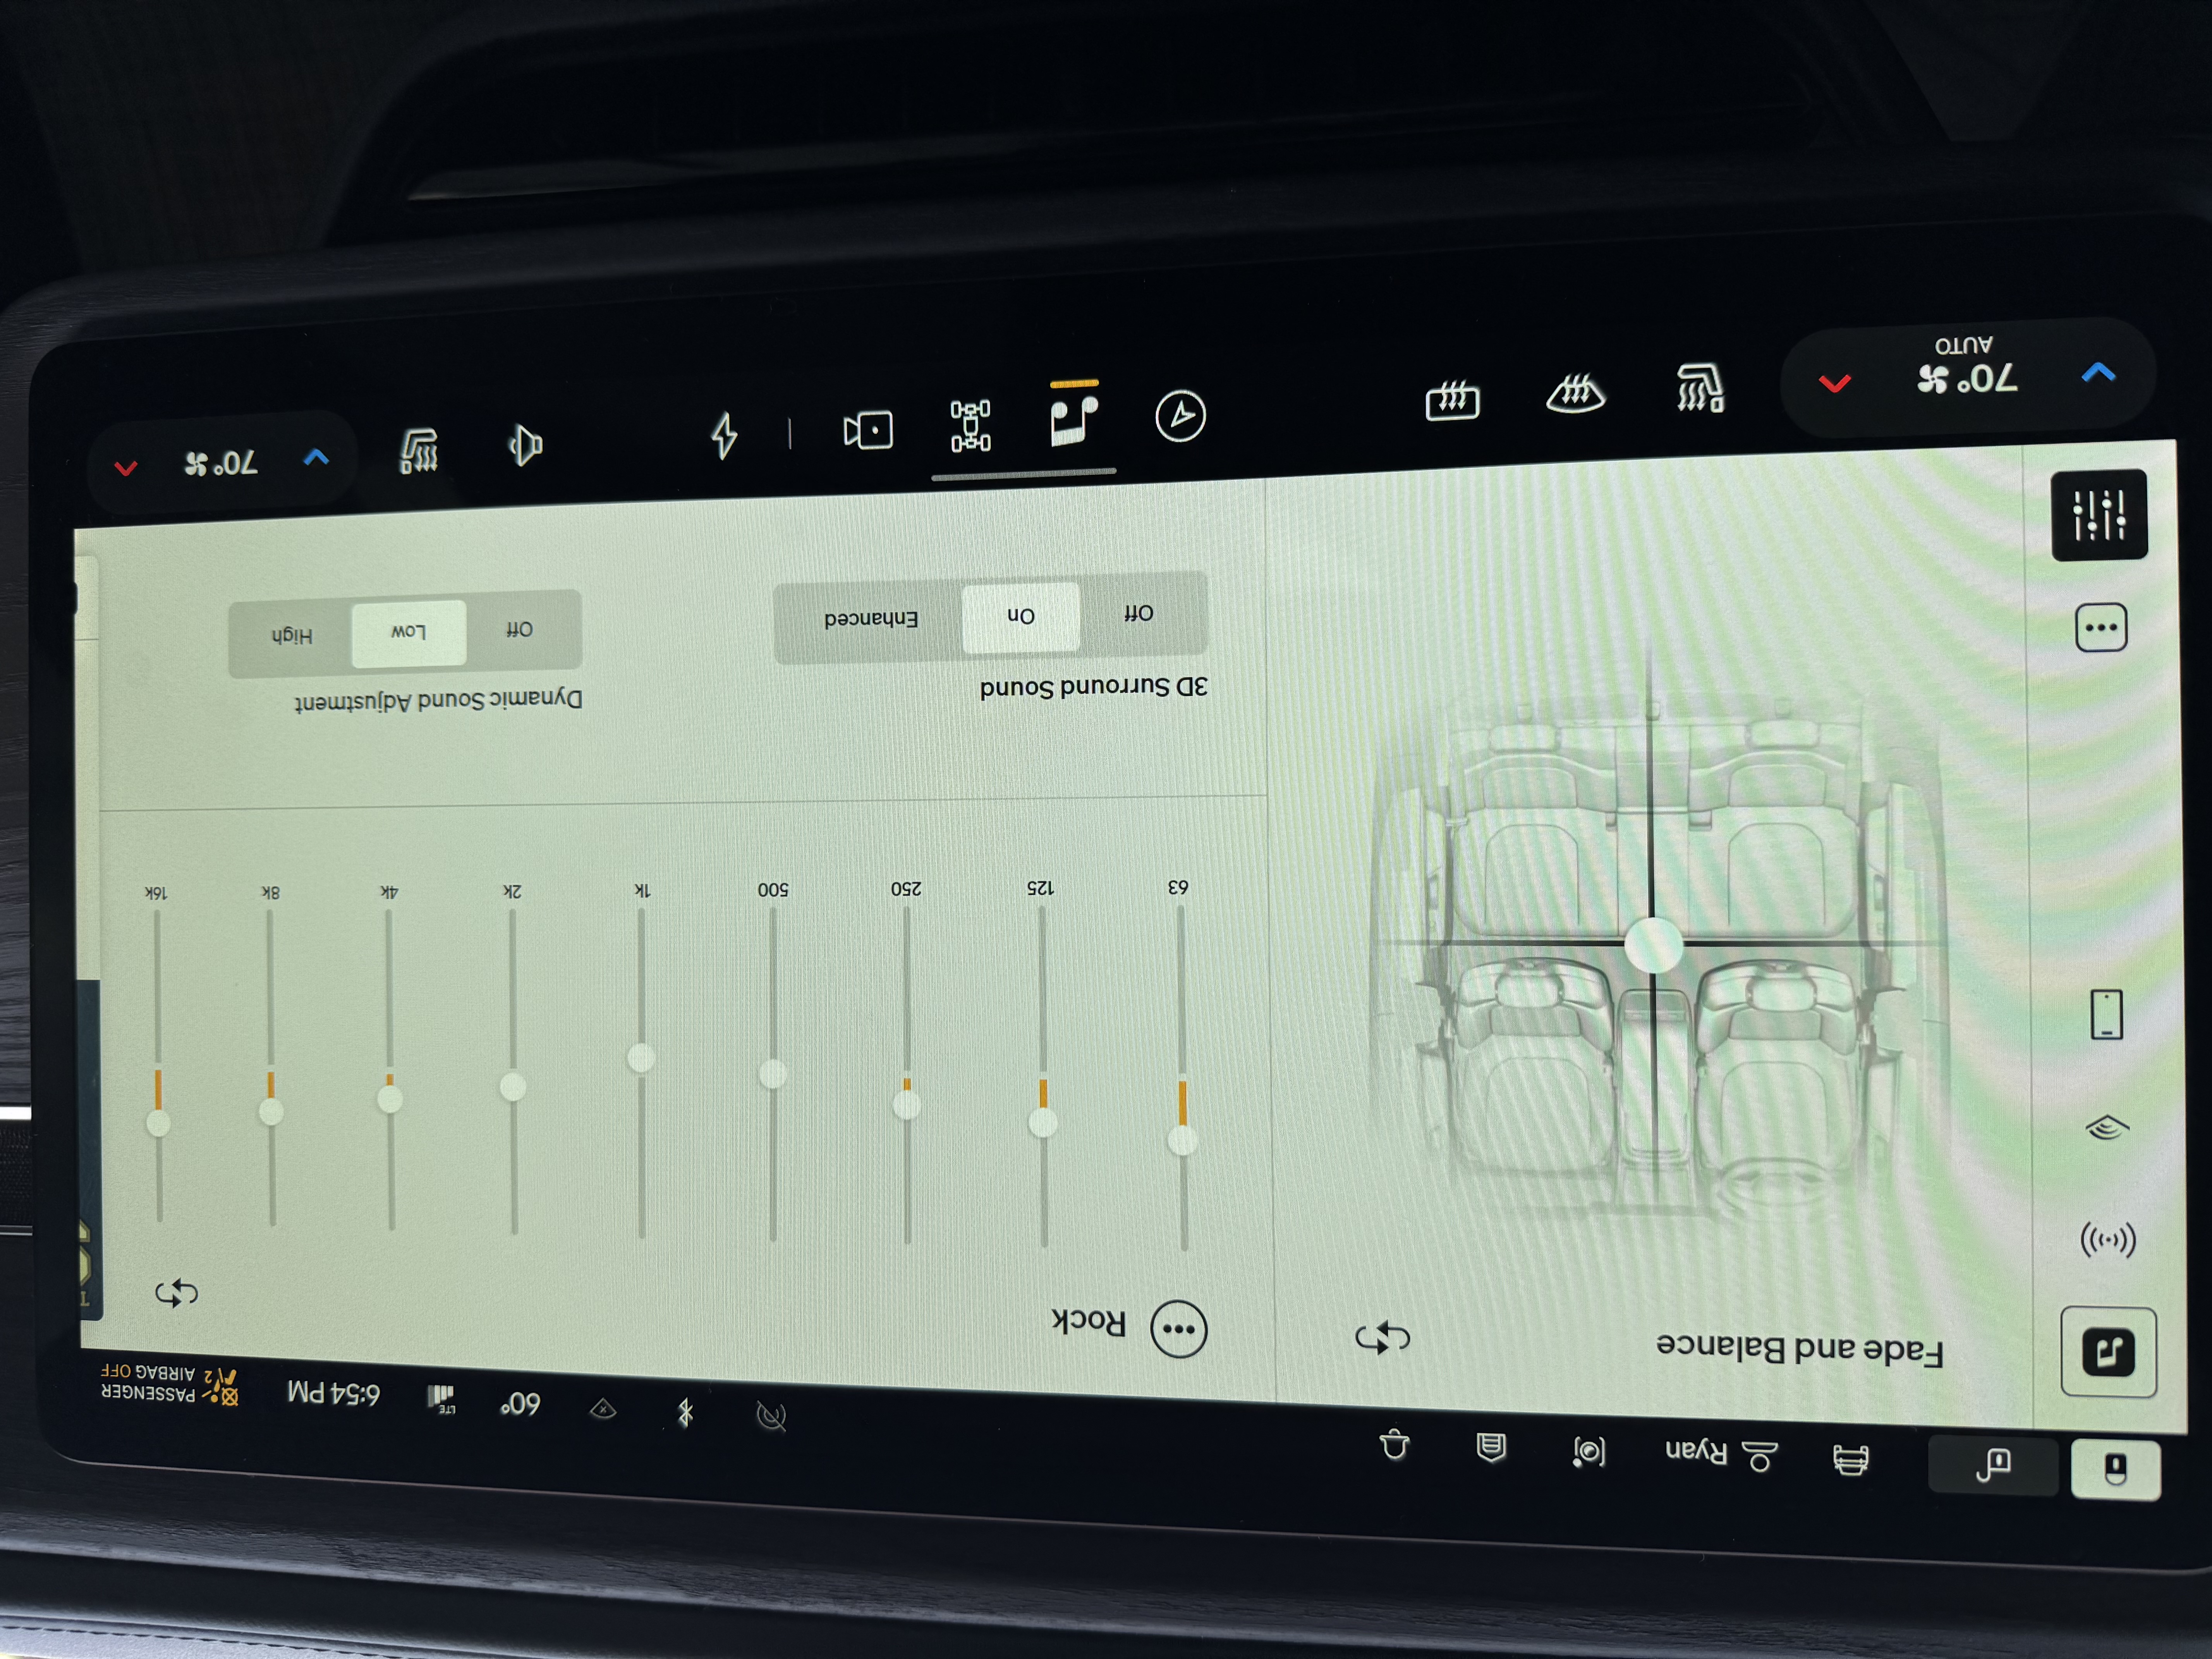
5. Apple Music Sound Quality
Speaker performance and sound quality is certainly a subjective topic, however a quick browse of the forums and you’ll find a healthy amount of discussions around the Rivian Premium Audio sound quality. If you primarily use Apple Music like I do, you may find a large disprepancy between the quality of the sound amongst your library. Whether I was listending to modern Dolby Atmos tracks, tracks from the 90s and 2000s that have never been optimized for digital streaming, or anything in between, one thing was certain: there was a definite inconsistency in how good it sounded.
After playing with a lot of the settings, here is what I ended up doing to make Apple Music sound better:
- Disable Spacial Audio
- Configure EQ to Rock
- 3D Surround Sound On (makes use of the overhead tweeters)
- Set Dynamic Sound Adjustment to Low
To disable Spacial Audio, tap on your user profile button on the top right:

And tap the toggle for Spacial Audio to disable it. This is most likely enabled by default for you
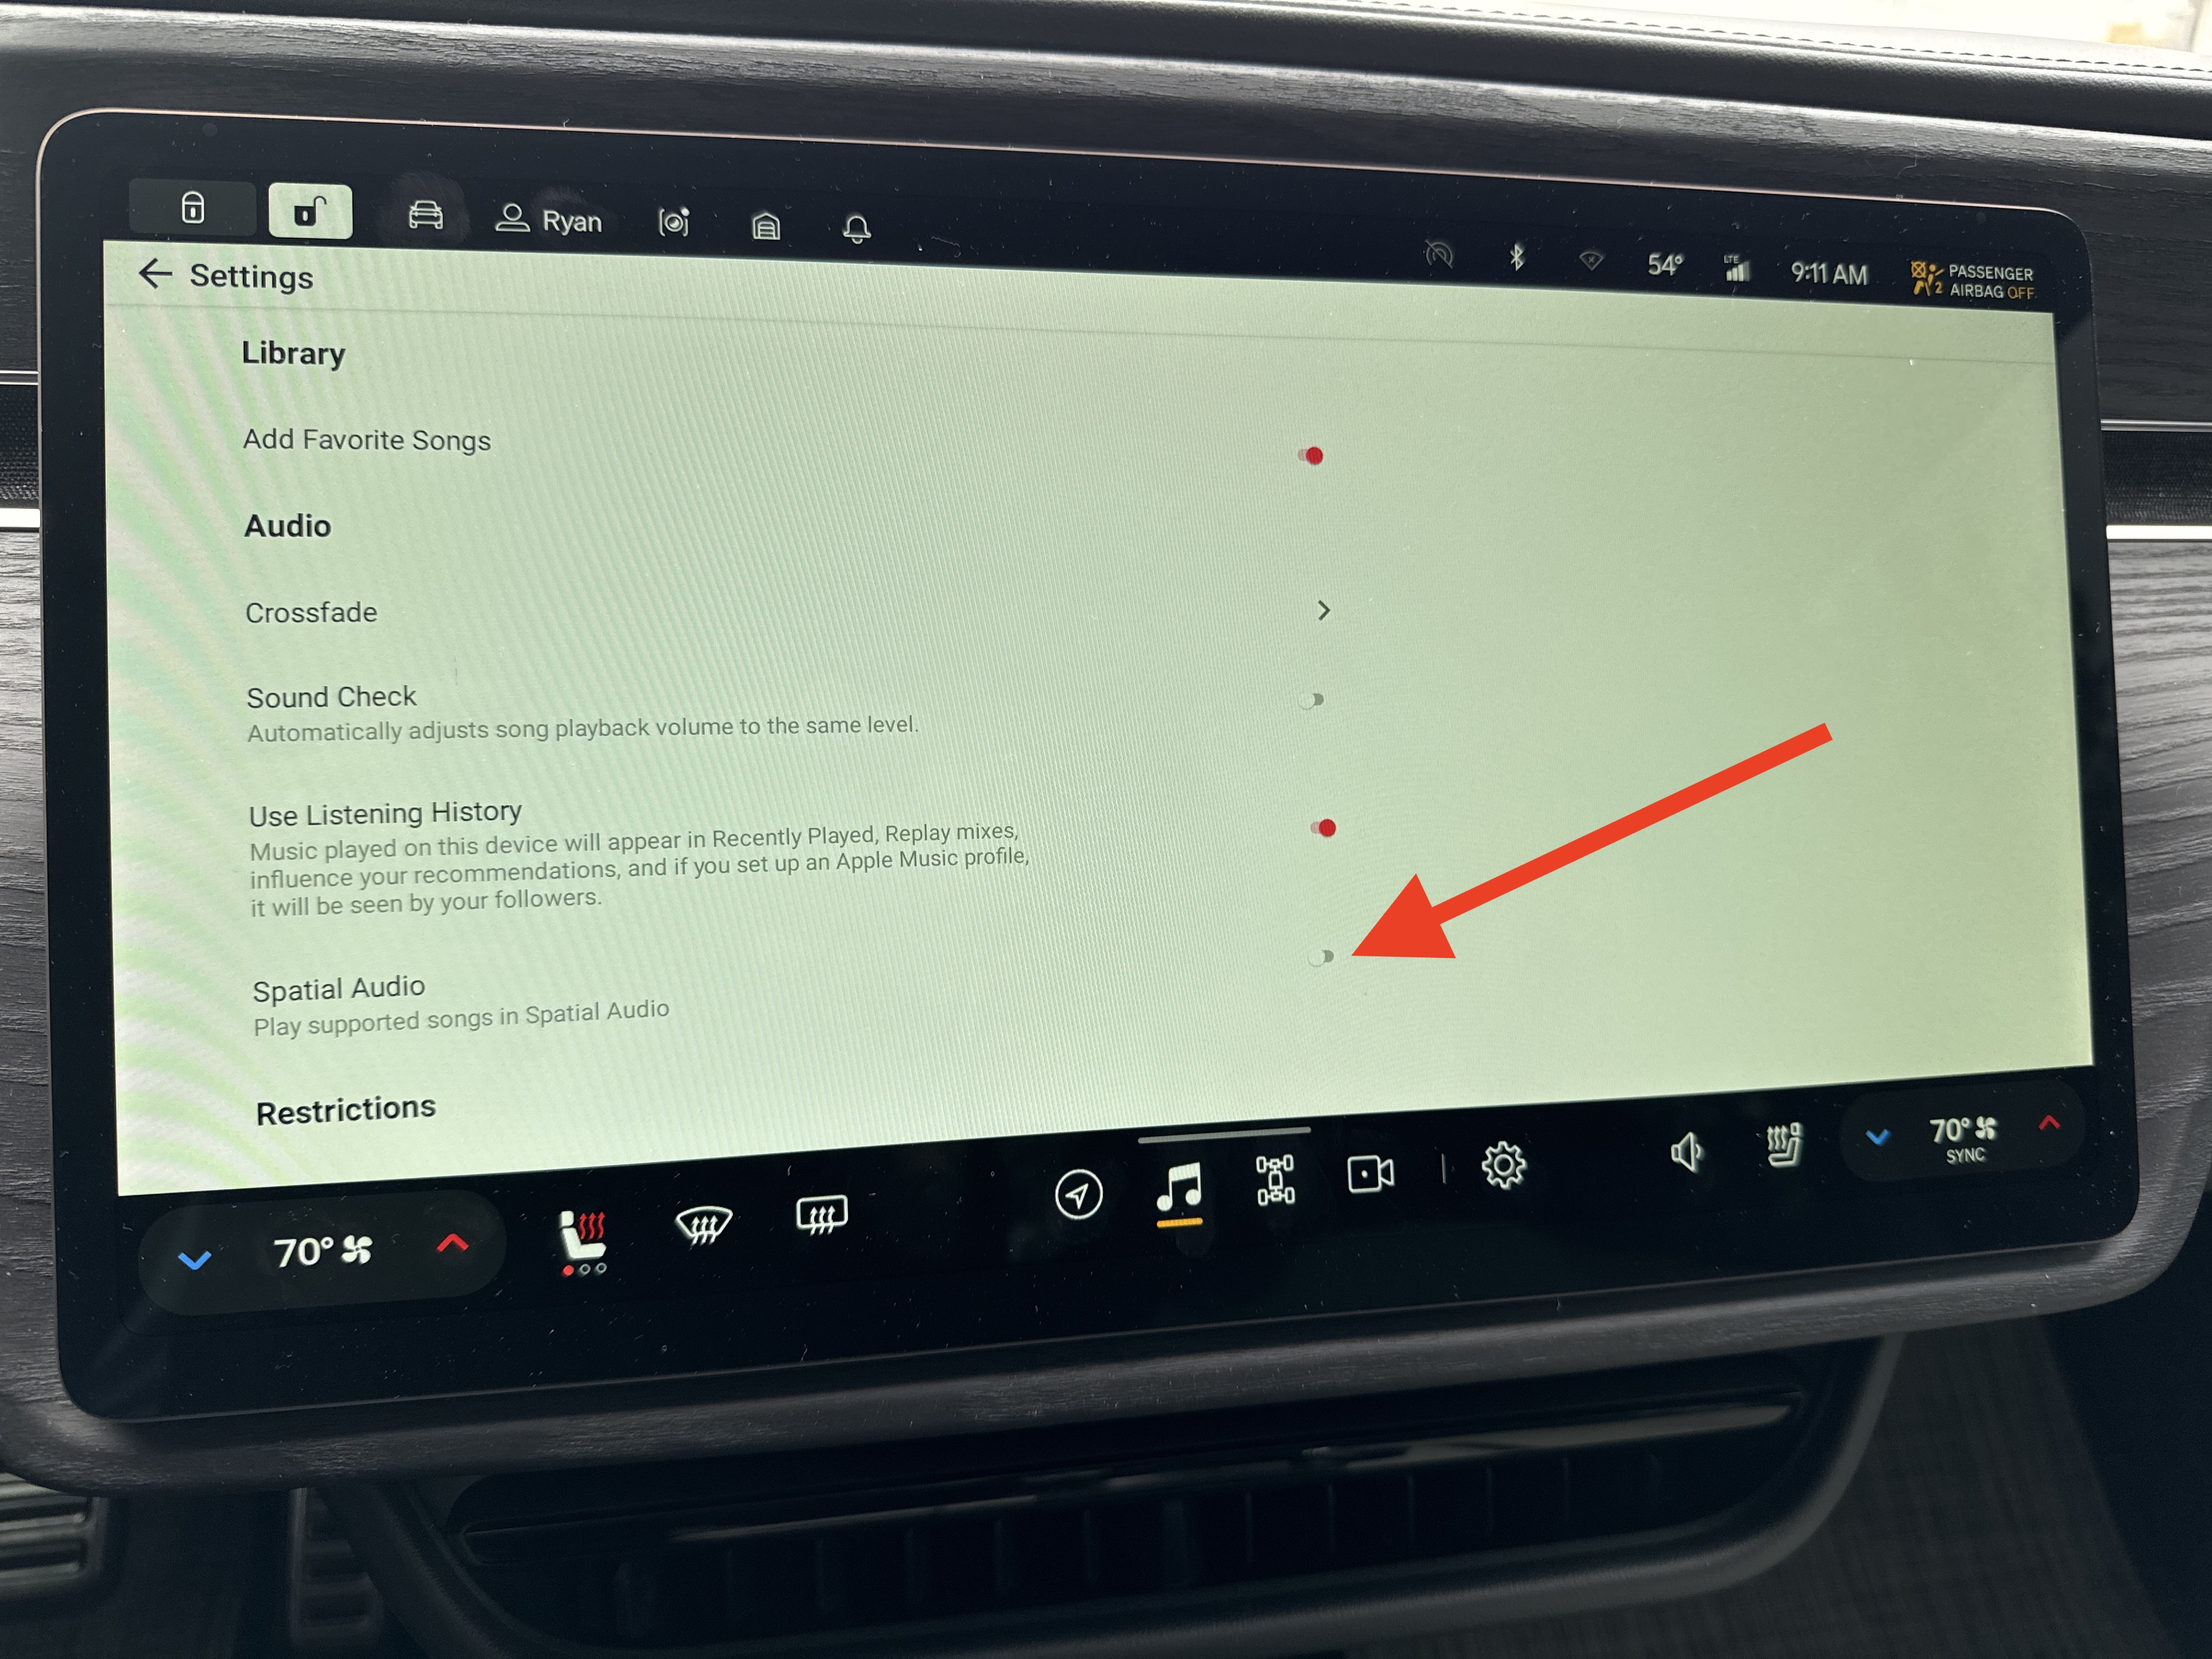
With these settings, YMMV so if it doesn’t sound quite right for you, continue playing and adjusting. I’d love to know what settings work best for you!
Hopefully Rivian will continue to tweak and enhance the default soundscape via software updates to really get the most out of this premium sound system.
BONUS TIPS
Whoohoo, Bonus! I’ve got 2 bonus tips for you – they’re bonus because they do require an additional purchase, but they are both totally worth it.
1. 90 Degree USB C Adapters
These little CableCreation 90 Degree USB-C Adapters are super cheap, and super worth buying. They make it so any USB-C cords you plug into the center console aren’t sticking straight up, risking getting bent or broken. It keeps the cords neatly tucked away to the sides and give that extra peace of mind. Even better, at the time of this writing they are 10% off of a $10 two-pack. See them on Amazon.
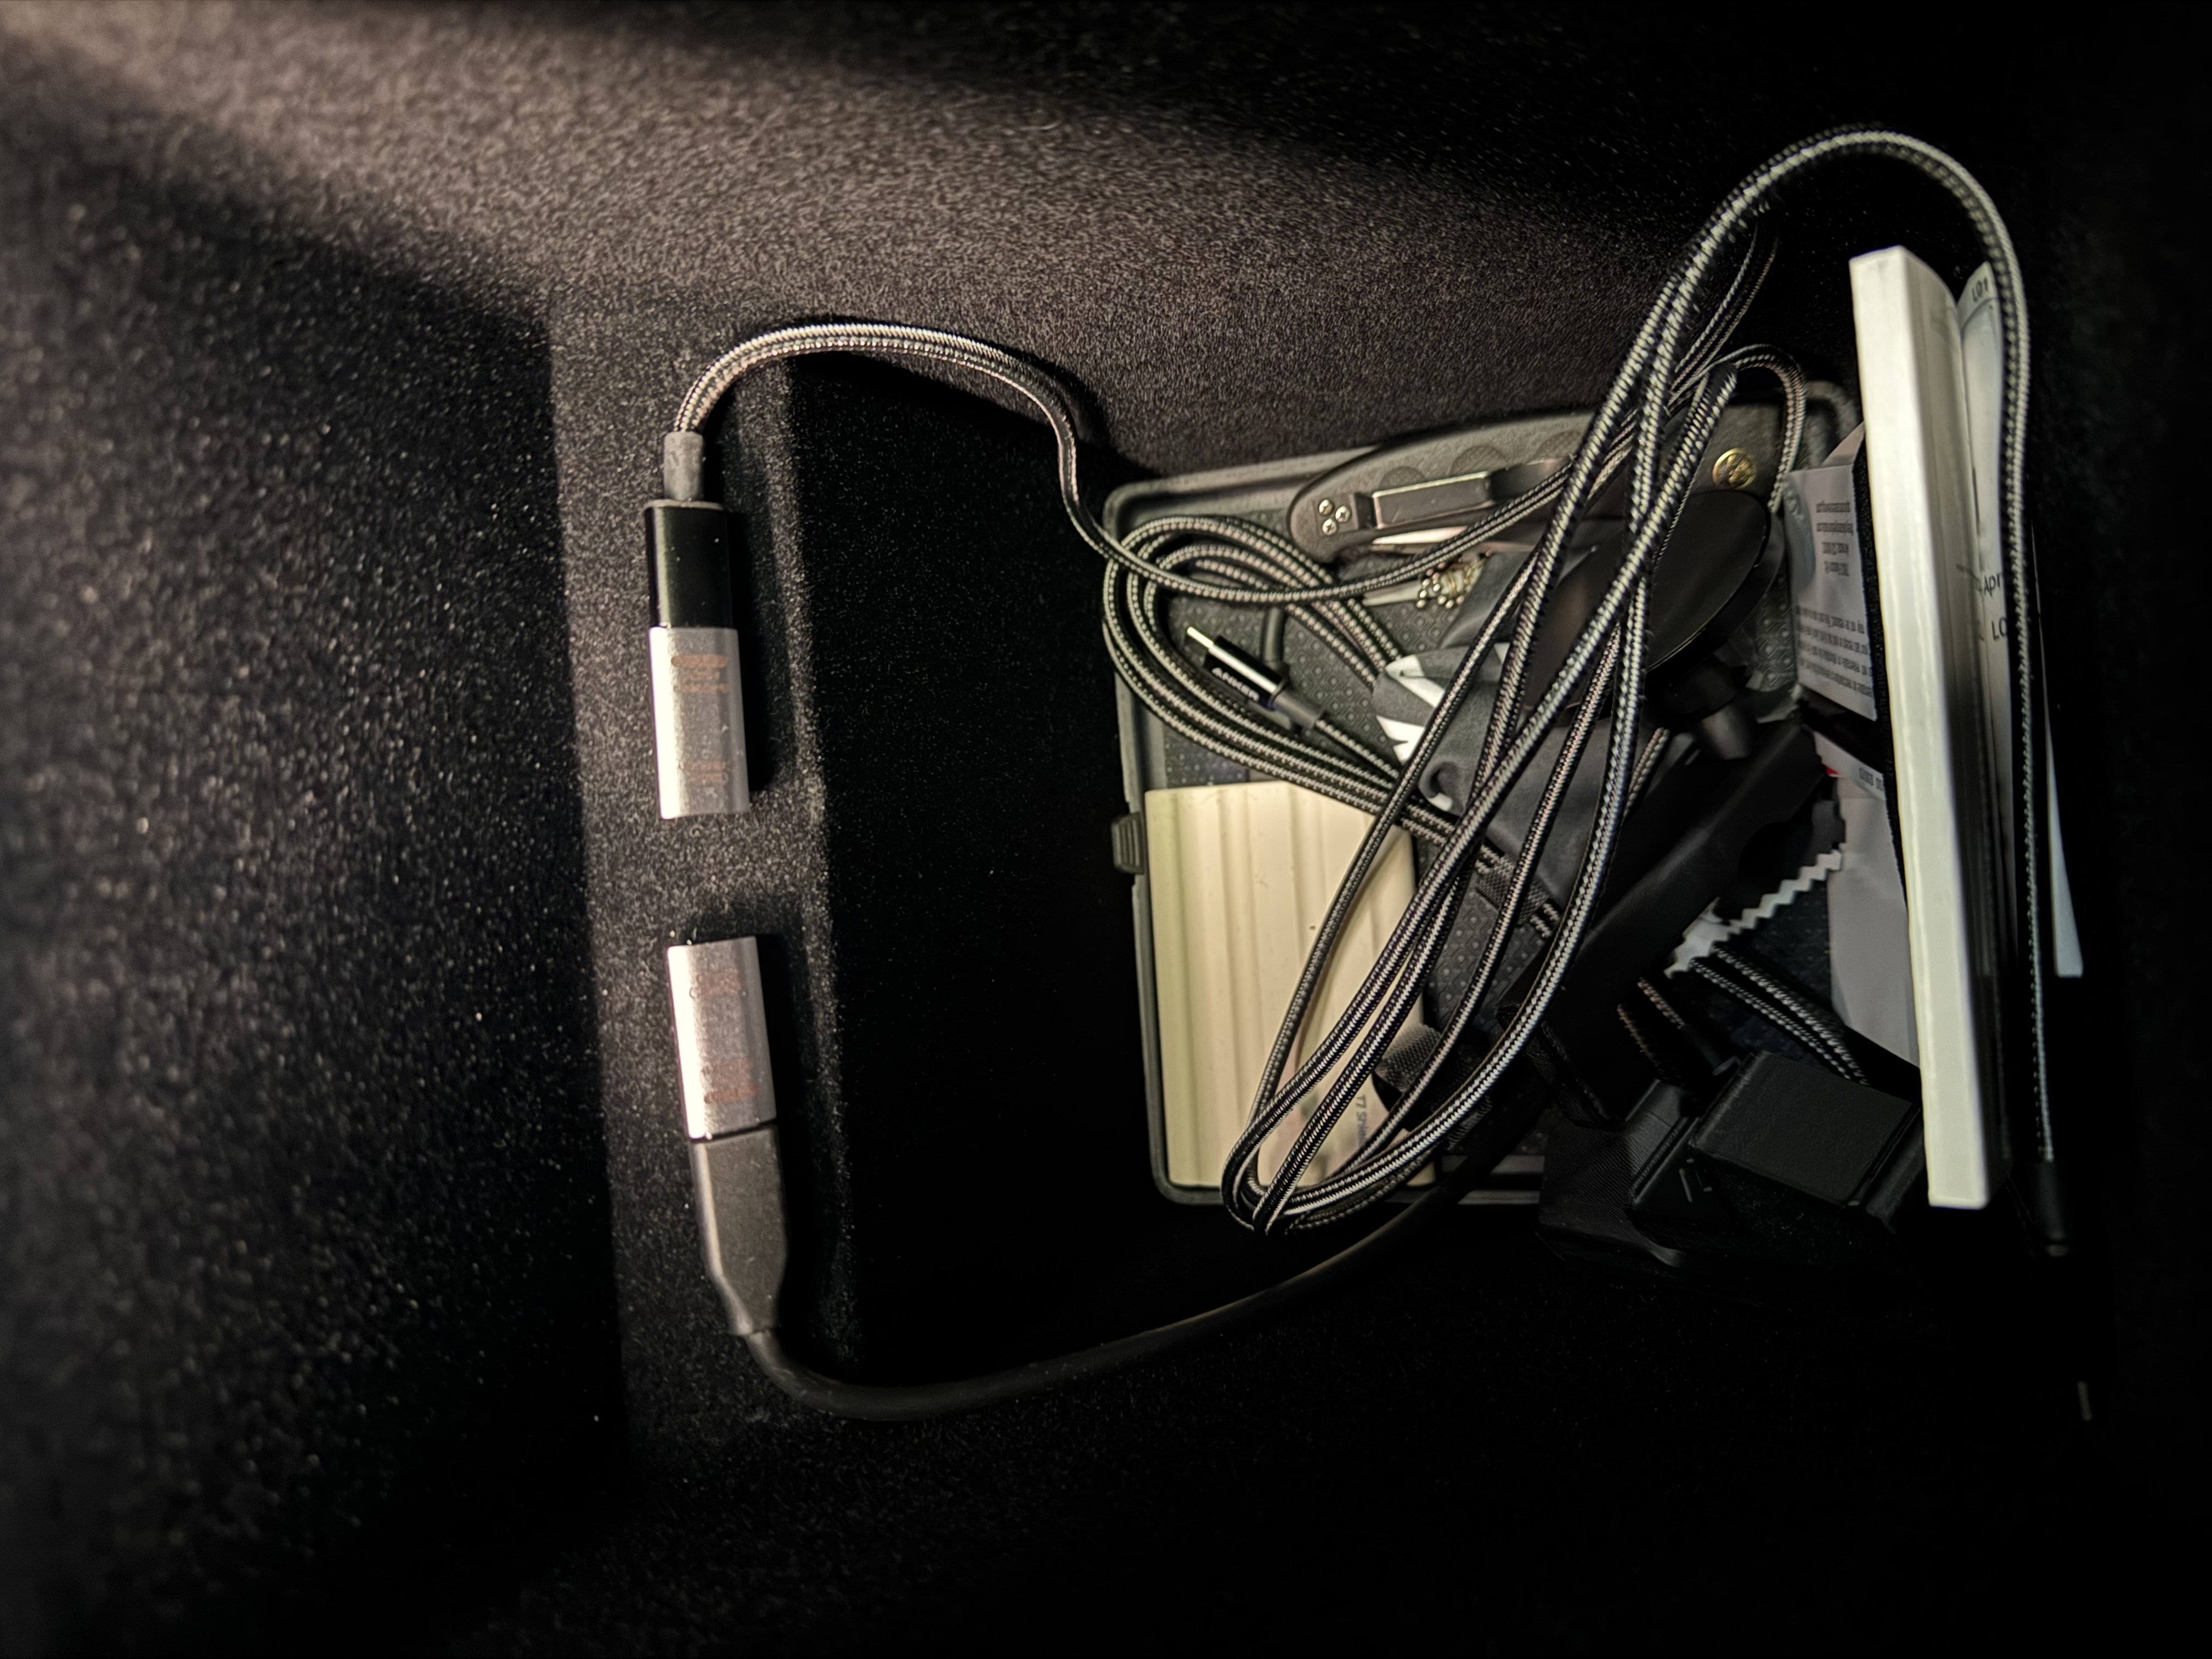
2. Portable External Solid State Drive
The very first accessory I bought for my R1T (before I even took delivery of my California Dune!) was a Portable External Solid State Drive for extending Gear Guard’s capability. You can see it in the above picture tucked away on the left. Gear Guard is great for adding an extra level of security and peace of mind. There are 3 types of recordings Gear Guard covers:
- Road Cam
- Incidents
- Motion Cam
Incidencts and Motion Cam both utlize the Rivian’s internal storage, so no external hard drive is needed to take advantage of those, which is super cool! However if you want to be able to continuously record driving footage while the vehicle is in motion, you’ll want to get a small SSD to store captures.
Furthermore, with Road Cam setup, two-minute clips can be manually captured by tapping a button on the display, honking your horn for over 1 second, or pressing the SOS button. I certainly wanted this ability in any event where additional footage would come in handy. And the best part is once the hard drive is plugged in and setup, it’s basically a “set it and forget it” – so I know I’ll always be covered!
I personally went with the 1TB Samsung T7 Shield in Beige. Figured it should match the Sandstone California Dune color scheme =)
Thanks for reading and congratulations on your new Rivian!
Get $500 of Rivian credit! Use code RYAN4190772 when ordering your new Rivian.