
In Part 1 of this 2-part series, I discussed the differences between the different pricing strategies developers are faced with in today’s app market.
In this post, I’ll share some technical details on how I converted my paid app to subscription/freemium. This post covers a SwiftUI app using Xcode 13.
When making such a drastic change in the pricing model for your app, you need to consider how to handle existing users who have already purchased your app up-front. Some apps disregard previous buyers and force them into the subscription model moving forward. If you want to avoid your app reviews being consumed with 1-star reviews, I’d recommend against this method.
I chose to honor existing users by ensuring they receive the app’s Lifetime Subscription at no additional cost. When they originally bought the app, they were agreeing to have that app and its full functionality from the get-go. Honoring this choice is not only fair, but puts the user first.
So how did I achieve this?
RevenueCat
 By far the easiest path to implementing subscriptions is to use RevenueCat. At first I didn’t like the idea of relying on a 3rd party for such a crucial function in my app, but the closer you look into RC and their SDK, the more you realize it’s not only the path of least resistance, it’s actually quite a joy to work with. Perhaps best of all, RevenueCat is free to use for any app making less than $10,000 MTR (Monthly Tracked Revenue).
RC has a terrific Quickstart Guide which I’m not going to re-hash in this post. The combination of RC’s documentation, and this video walkthrough from Sai of Design+Code helped me get up and running super quick.
I should mention the above video utilizes RevenueCat SDK 3 so be sure to utilize RC’s V4 SDK documentation to make any necessary adjustments if you decide to use their latest builds.
Once you have RevenueCat up and running in your app, you can begin handling your grandfathered users.
Handling existing vs new users
My app is a SwiftUI app with the SwiftUI App Lifecycle.
In my App.swift file, I built a check that validates the app’s build number in the user’s receipt from when they originally downloaded the app. This checks the value of originalApplicationVersion from the receipt.
In the above sample, I’m using a compare operation on the Swift Numeric to validate if the Receipt build number is less than, greater than, or equal to the build number that reflects the new pricing model. Be sure to use the actual build number and not the app’s version number. You can read more about numerics and compare on Sarun’s site here.
Then based on whether or not the user is calculated as grandfathered, I save that as a boolean value in the UserDefault value grandfatheredPro
NOTE: I initialize
freemiumBuildas1.0because your app will always reflect a build number of1.0while in development. You will want to change this value to your actual build number when pushing to production.
Now, at app launch we want to validate if the user is a Pro user or not, then handle the paywalls within the app accordingly. In my app, I use the UserDefault flag isPro for this. In our case, we want the flag isPro to equal true if they have an active entitlement, or if they are a grandfathered user:
Great! We can now know if the user should be a Pro user or not. However this code alone will not work right off the bat for your existing paid users.
The issue here is that user receipts aren’t synced to RevenueCat until after a user either makes a purchase, or calls restoreTransations (usually handled with a Restore Purchases button). So upon initial upgrade, the above code will print out *** NO RECEIPT FOUND *** for all users since this is the first build RevenueCat has been implemented in.
This unfortunately means that every paid user who upgrades the app to the new Subscription model version will initially start out as a Free user.
Taking care of existing paid users
We need a way to make it easy for our users to pull that receipt data. I would imagine there are lots of ways to accomplish this. I would have thought to just code the restore operation, however RevenueCat’s documentation states that we shouldn’t do that programmatically.
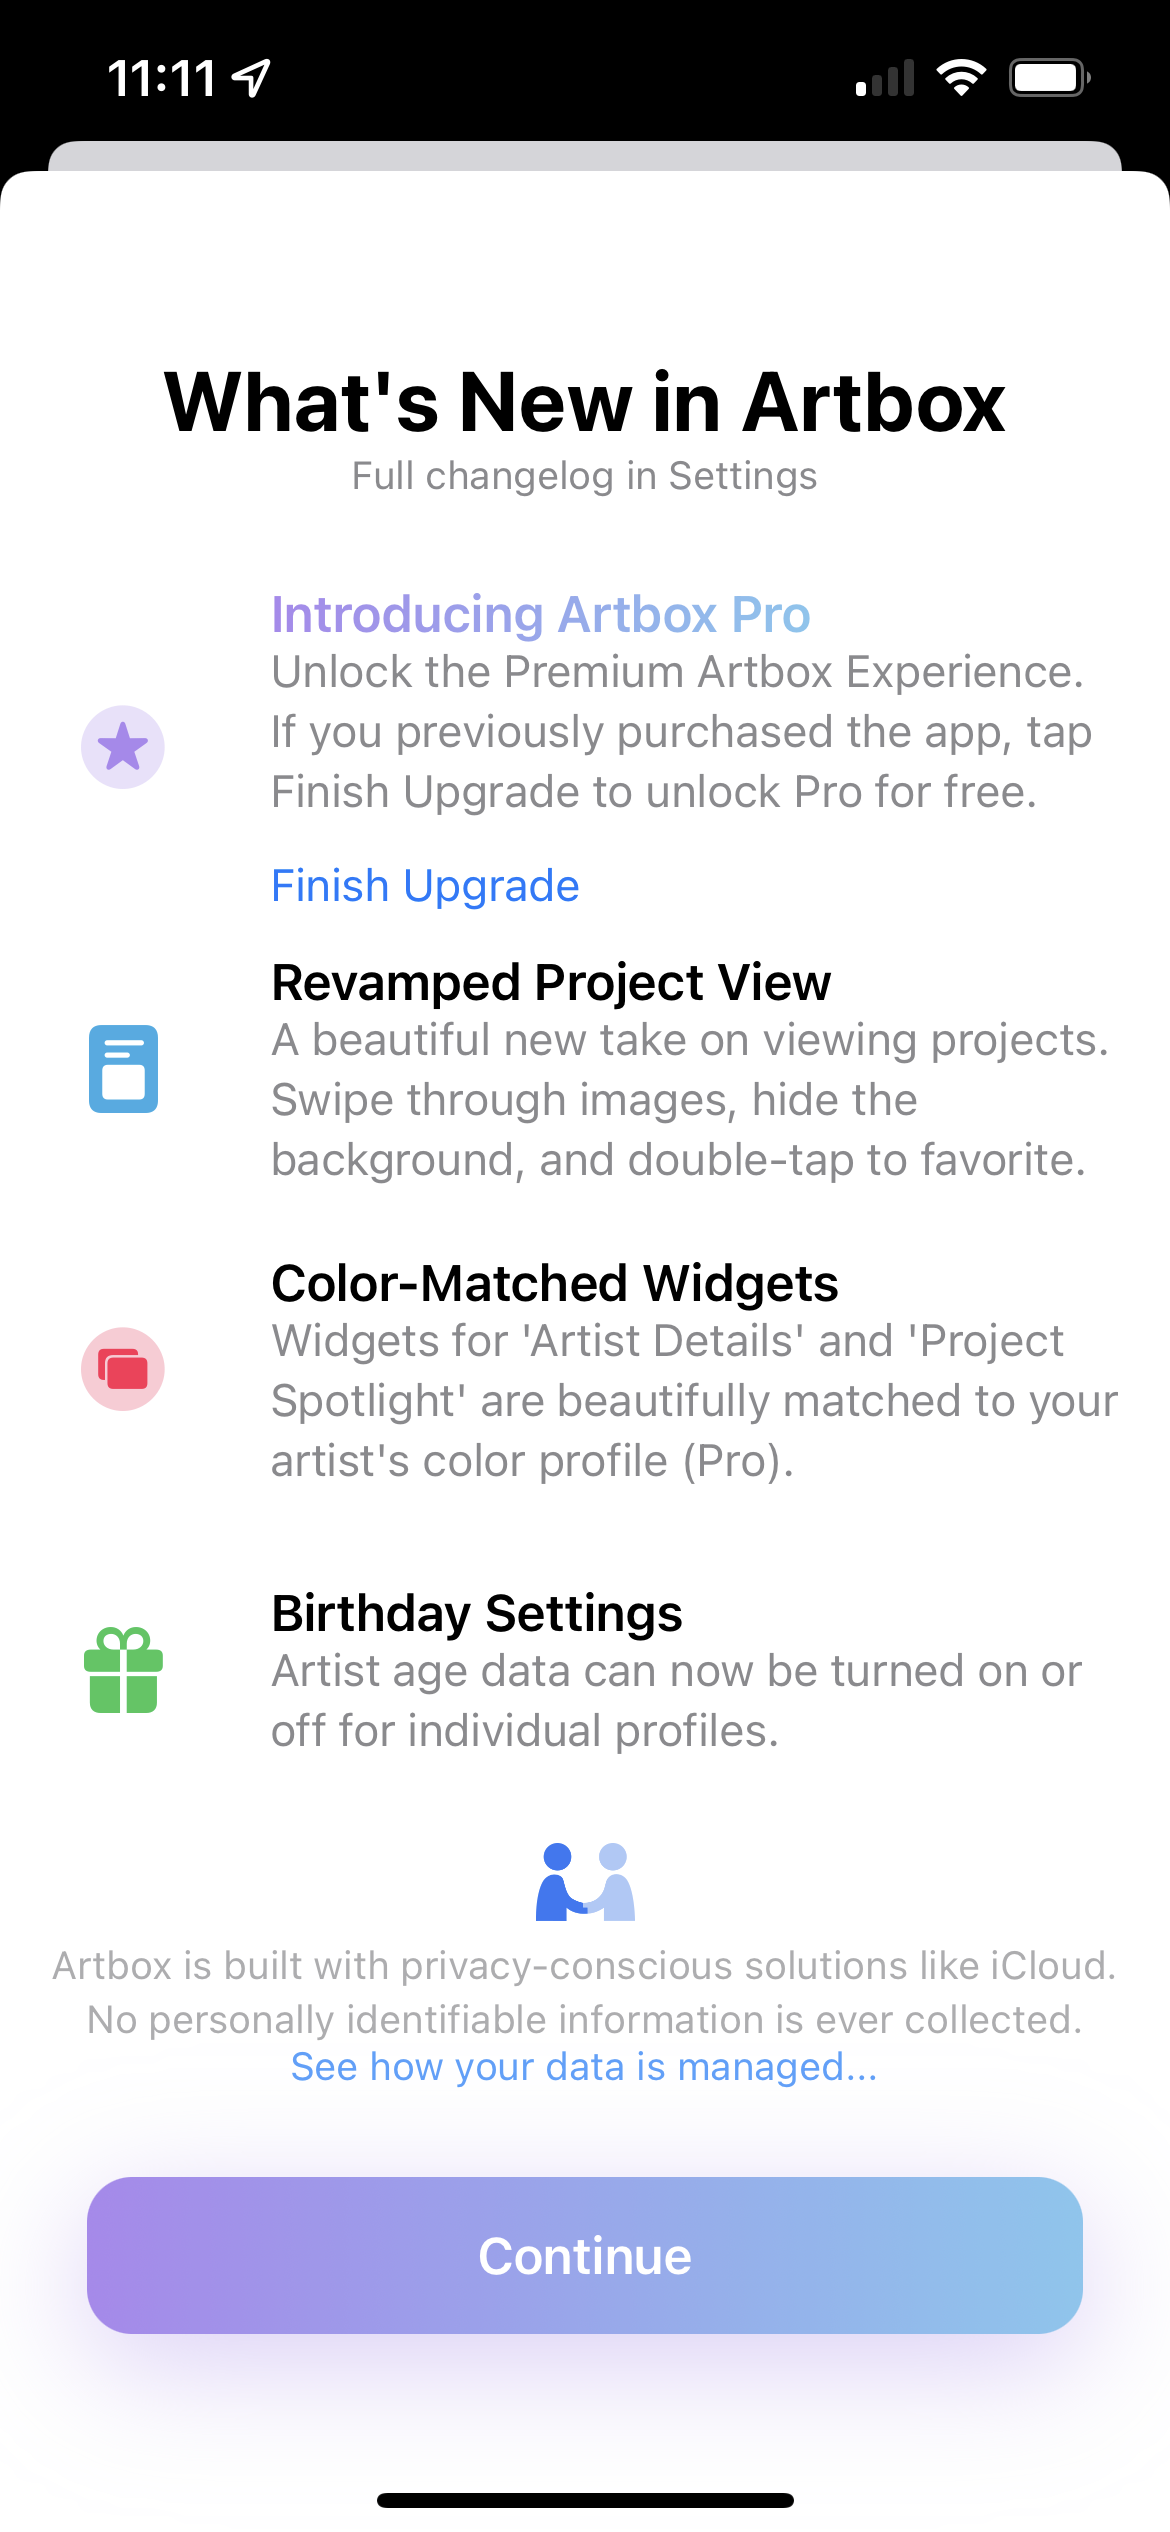
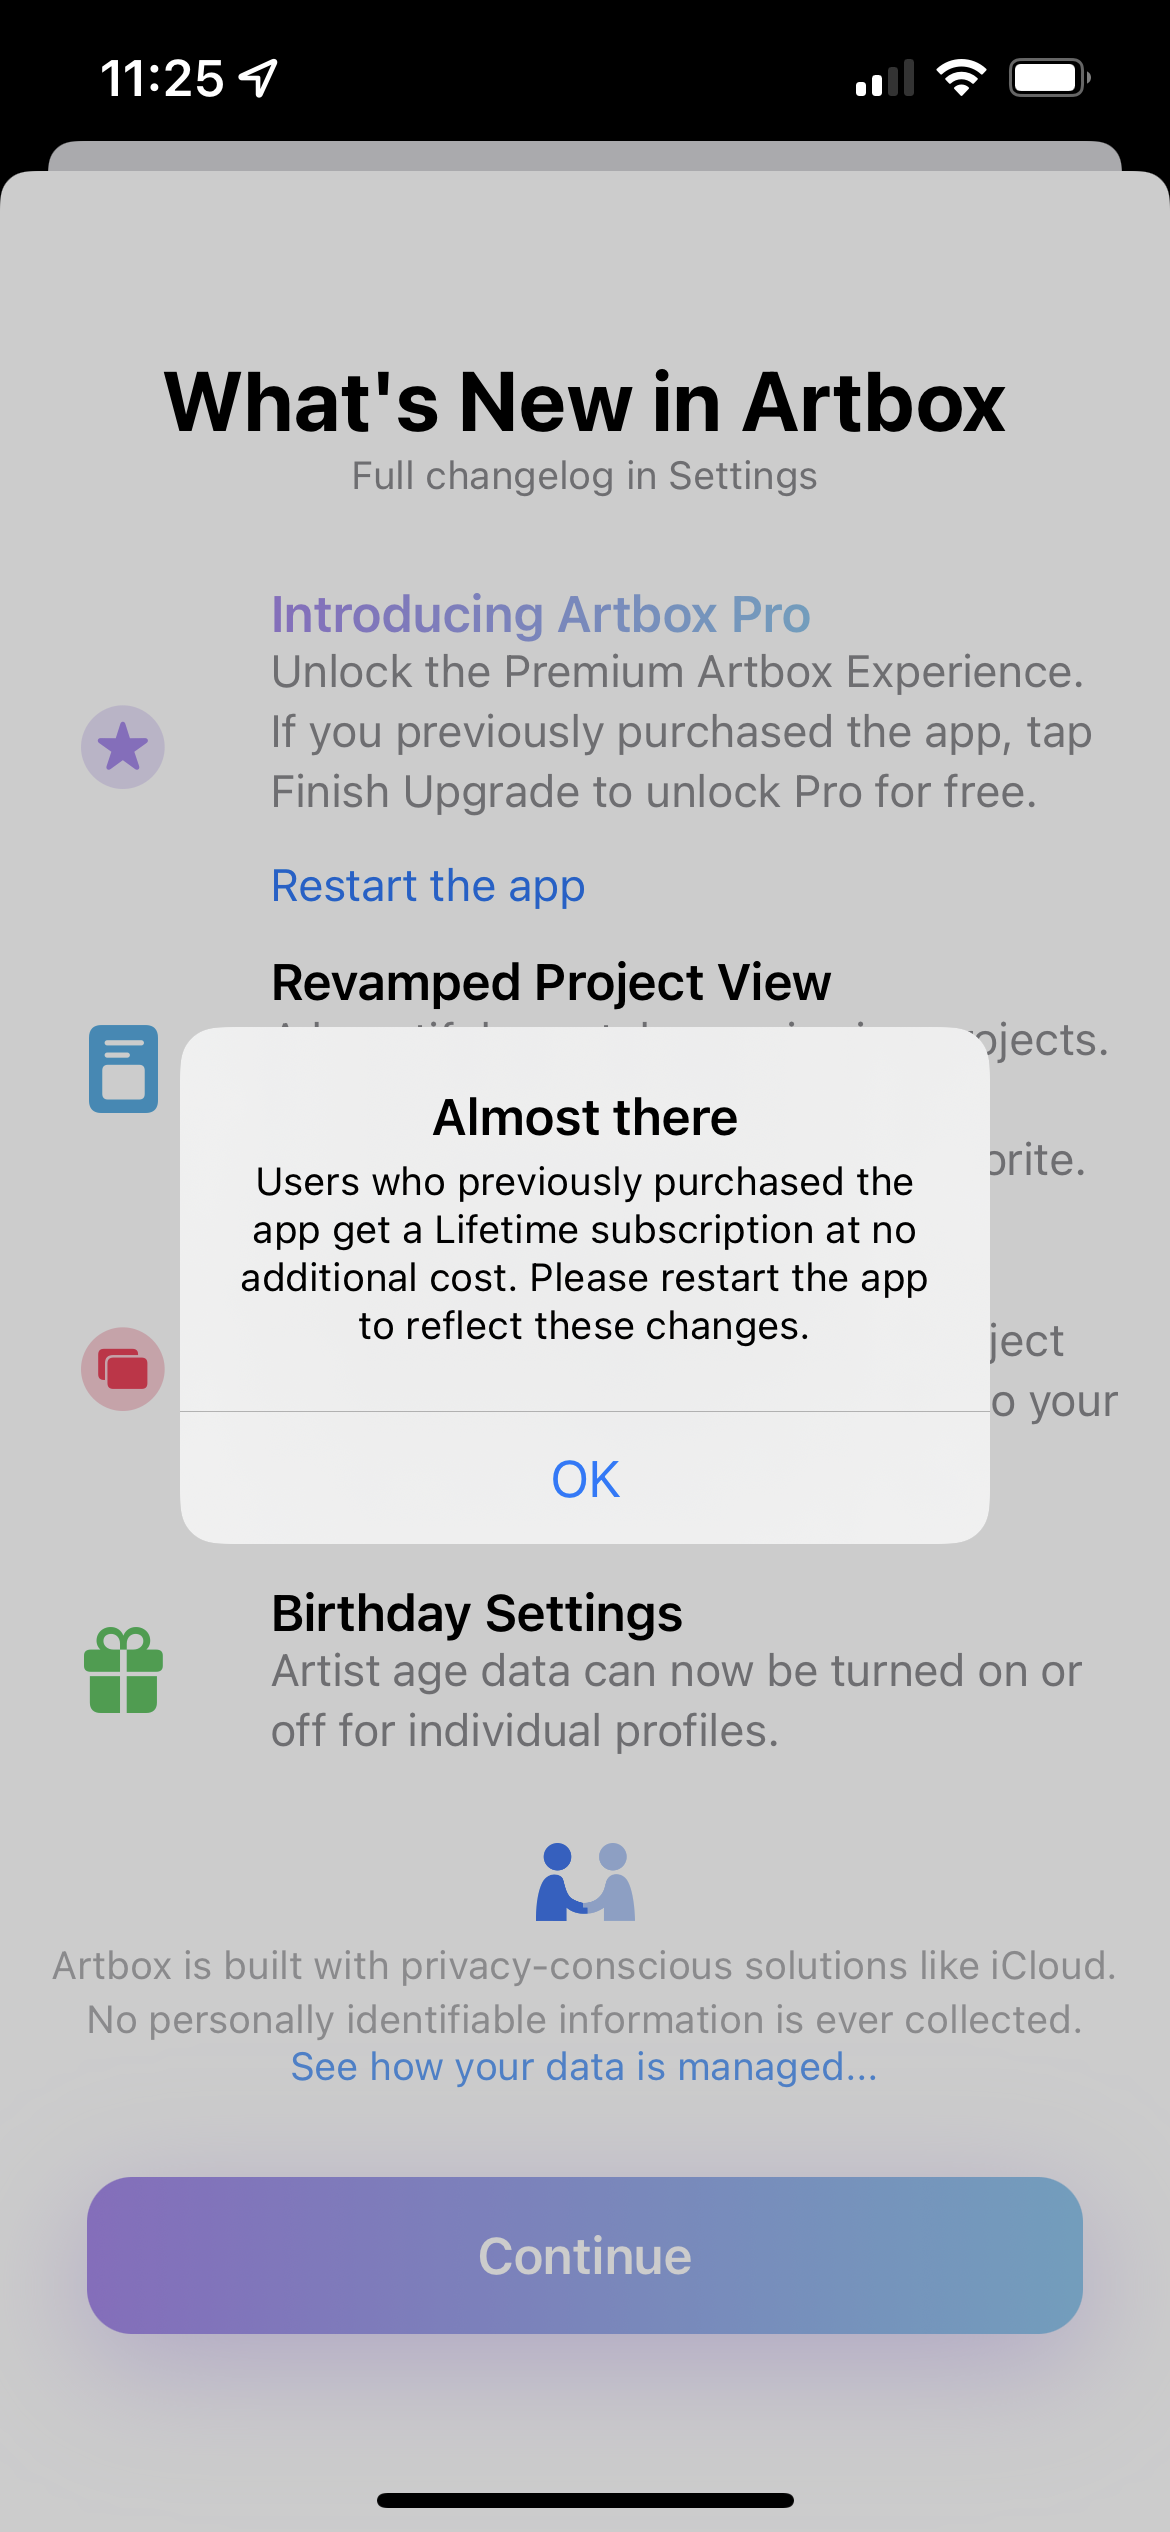
In my case, I ended up adding a note in my What’s New popup for users to Finish their upgrade by tapping a button. That button would then call the restorePurchases method, then display an Alert based on a @State variable.
The alert explains that the user should now restart the app to reflect the changes. Now the receipt should be properly pulled and synced with RevenueCat, and the checks can validate the proper grandfatheredPro value. If you choose to go a manual route like this, it’s important to encourage the user to perform the restore/restart operations early on so that they aren’t presented any paywalls while navigating the app.
It’s not a perfect system. I wish it could have been done all behind the scenes without any user interaction, but this method seemed to work, and users were happy to continue their Lifetime license.
Summary
Thanks for reading! I hope you found something helpful in this post. We learned that RevenueCat is extremely developer-friendly in-app purchase solution, especially for indie devs, and that it really doesn’t take much code to validate receipts. We also learned one method of encouraging our paid users to complete their upgrade by forcing a restoreTransactions operation so they don’t get too far into the app without having the fully unlocked experience.